
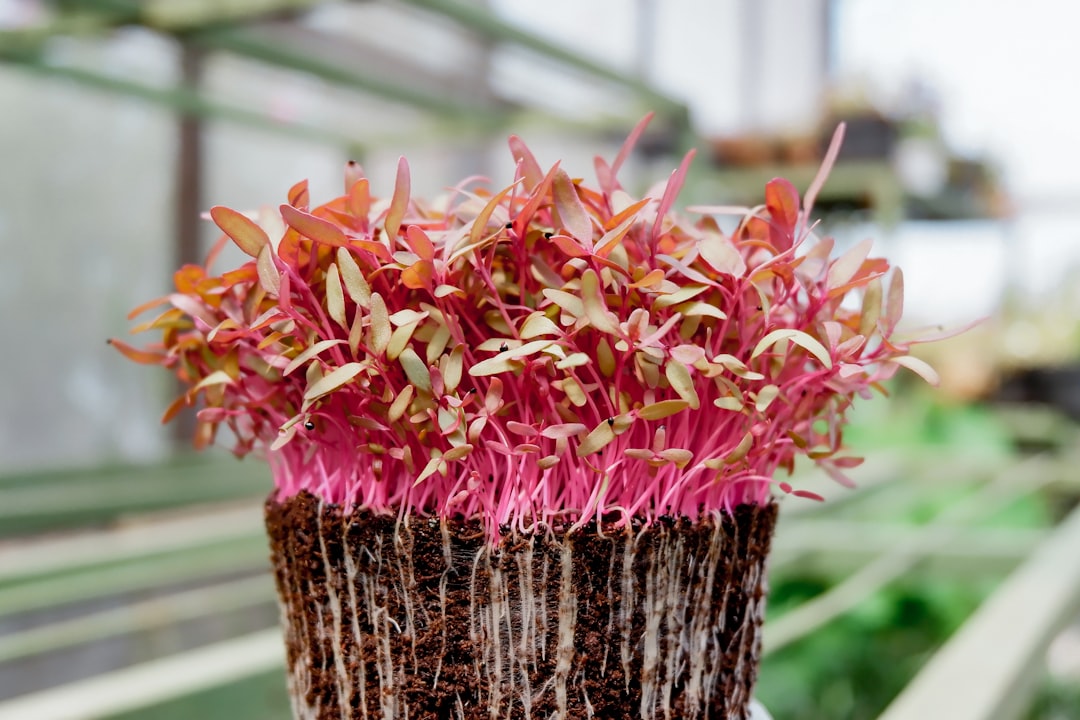
Two nearly identical trays can create very different growing days.
A beginner sets one black tray on the counter, adds damp growing mix, sprinkles seed, and feels ready—until water pools in one corner or slips onto the shelf underneath. Another tray may look the same at first glance, but a few small holes change everything once soil, roots, and rinsing are involved.
The real question is not whether microgreens trays must have holes. It is how water moves through the setup. Holes let extra moisture drain away; solid trays hold water where it lands. Either can work, but each asks for a different watering habit, a different bottom tray arrangement, and a little attention to leaks before the crop is sitting beside a windowsill or kitchen counter.
Both tray styles can work
- Holes drain A tray with holes lets extra water escape, which lowers the odds of soggy roots and sour-smelling growing medium.
- No holes catch A solid tray catches runoff, protects shelves and counters, and makes bottom watering much tidier indoors.
- Together is easier For many home growers, the easiest setup is a perforated growing tray nested inside a solid catch tray.
- Solo needs care Single-tray setups can still work, but they need closer attention to water amount and where overflow goes.
A forgiving starter setup is often one tray with drainage holes sitting inside one tray without holes. The top tray holds the soil or mat; the bottom tray catches drips and can hold a shallow layer of water for bottom watering.
This pairing does not remove all guesswork, but it gives extra room for small watering mistakes—especially on kitchen counters, windowsills, or wire shelves.
One setup I use combines both: a perforated growing tray nested inside a solid water tray. I show that arrangement in my review of stainless steel microgreens growing trays.
Why holes make watering easier
Perforated trays are popular because they let extra water leave the growing layer instead of sitting around the roots. That matters most with soil or coco coir, which can hold moisture for a long time after watering. Without drainage, a heavy pour can turn the tray into a shallow swamp, especially near the corners where water tends to collect.
Holes make the setup more forgiving. If the medium is slightly overwatered, the excess can drip into a solid catch tray underneath. This does not remove the need for good watering habits, but it gives beginners a wider margin before problems like sour-smelling soil, algae, or weak, stretched growth show up.
A perforated tray also makes bottom watering microgreens trays simple. Water goes into the solid tray below, then the soil or coco absorbs moisture upward through the holes. The stems and leaves stay drier, the surface is disturbed less, and watering tends to feel more even across the tray.
A practical pairing is one tray with holes nested inside one tray without holes: drainage above, leak protection below.
The trade-off with drainage
Perforated trays make watering feel more forgiving because excess water can escape before the root zone stays soggy. That is especially helpful with dense sowings, shallow soil, or growers still learning how much water a crop actually uses.
The catch is practical: holes turn every watering into a runoff-management task. On a kitchen counter, shelf, or windowsill, even a small leak can leave muddy rings, damp towels, or water under grow lights. A tray with holes usually works best when it sits inside a matching solid tray, so drainage is captured instead of becoming a mess.
That paired setup is common in many home microgreens supply setups because it separates two jobs: the top tray holds the growing medium, while the bottom tray catches water and protects the surface underneath.
Solid trays have a real job
A solid tray is not simply the “lesser” option. It can be the right tray when spills matter more than perfect drainage, such as on apartment counters, wooden shelves, classroom tables, or anywhere water damage would be annoying.
Solid trays are useful for:
- Bottom trays, catching runoff from a perforated tray above.
- No-leak growing, when watering is done carefully and lightly.
- Soaking or pre-moistening mats, especially with hydroponic pads.
- Transporting trays, since water and loose soil stay contained.
The main caution is that solid trays leave less room for mistakes. If too much water is added, it has nowhere to go. Many growers handle this by watering in smaller amounts, tipping out visible standing water, and checking the weight of the tray rather than watering on a strict schedule.
For tidy indoor growing, solid trays are often part of the system rather than a compromise. A perforated tray may manage the root zone, while a solid tray keeps the room clean. Together, they make microgreens easier to grow in real living spaces, not just in ideal grow-room conditions.
The main risk with a no-hole tray
Planting directly into a solid tray is not automatically a problem. Many small indoor grows use this setup successfully, especially with a shallow layer of medium and careful watering. The catch is that extra water has nowhere to leave the tray, so mistakes tend to sit at the bottom.
When the lower part of the medium stays wet for too long, the surface can still look normal while the root zone is becoming soggy. That trapped moisture may lead to slow growth, weak stems, or patches that collapse before harvest. In some cases, stale water at the bottom can create a sour or swampy smell.
Low airflow makes this easier to notice. A dense canopy, a warm room, or trays packed closely together can keep humidity high around the crop. With no drainage holes, the grower has fewer ways to correct an overwatered tray besides waiting, increasing airflow, or gently tipping off excess water if possible.
A solid tray works better when watering is light and even. The medium should feel moist, not muddy, and the tray should not slosh when moved. Small, frequent watering adjustments are usually safer than adding a large amount at once.
Lift one corner of the tray gently. If it feels heavy, smells stale, or the lower medium looks shiny and saturated, waiting a little longer can help prevent the bottom layer from staying waterlogged.
Match the tray to the way the greens are grown
-
Soil or coco grows
Loose media usually benefits from a tray with holes nested inside a solid catch tray. The upper tray can drain after misting or bottom watering, while the lower tray keeps shelves and counters clean.
Look forA perforated growing tray with a snug, solid bottom tray for runoff control.AvoidPlanting deep, wet media in a solid tray with no escape route for extra water. -
Grow mats and shallow media
Hemp, jute, paper, or thin coco mats can work in solid trays because they hold a more predictable amount of moisture. They still need attention, especially around corners where water can pool or dry out unevenly.
Look forA shallow solid tray when the mat is thin and moisture is checked often.AvoidLetting mats sit in puddles, or assuming a solid tray means less monitoring. -
Hydro-style setups
A no-hole tray can make sense when water is intentionally held below the roots, especially with pads, mesh inserts, or a second support layer. The key difference is that the tray is being managed as a small reservoir, not as a pot full of soaked media.
Look forClear separation between roots, support material, and standing water.AvoidTurning a soil tray into a reservoir without airflow around the root zone. -
Seeds, humidity, and daily attention
Dense crops such as broccoli, radish, and mustard can trap moisture quickly, while larger seeds like peas and sunflower often need more structure and airflow. In humid rooms or for growers who check trays less often, holes add a helpful safety margin.
Look forMore drainage and airflow for dense sowing, large seeds, humid rooms, or irregular watering checks.AvoidPairing heavy seeding, still air, and a sealed wet tray for several days at a time.
A tidy nested-tray routine
-
Set the perforated tray inside a solid tray.
-
Mist or lightly top-water until seeds root.
-
Switch to bottom watering once roots reach down.
-
Add a shallow amount, then check later.
-
Empty stale standing water; keep trays clean between batches.
Standing water is a holding zone, not storage. A little can hydrate roots; too much can turn sour, especially in warm, still rooms.
Holes or no holes
Donny Greens discusses whether microgreen trays need holes, a useful companion when comparing nested drainage trays with direct planting in solid trays.
Durability matters more after the first batch
-
Stiffness when full
A tray that feels fine empty can twist once wet medium and dense greens add weight. For repeated crops, sturdier trays for repeat growing are usually easier to lift without flexing or spilling.
Look forA rim and base that stay fairly rigid when lifted with one hand at each end.AvoidVery floppy trays that bow sharply, especially when nested or moved to a sink. -
Usable depth
Shallow trays dry faster and may leave less room for roots, while deeper trays hold more medium and moisture. The useful middle ground depends on crop height, watering style, and shelf clearance.
Look forEnough depth for an even medium layer without crowding lights or shelves.AvoidBuying extra-deep trays just for strength if they make watering checks harder. -
Cleaning and reuse
Microgreen trays get scraped, rinsed, and dried often. Smooth corners and plastic that tolerates repeated washing can make reuse less frustrating.
Look forSurfaces that rinse clean without many ridges catching roots and debris.AvoidBrittle plastic that cracks at corners after a few washes. -
Trial versus routine use
Thin trays can be perfectly reasonable for testing varieties or learning a setup. Once batches become regular, durability often saves annoyance more than it changes the grow itself.
Look forBudget trays for experiments; thicker trays for steady rotation.AvoidOverbuying premium trays before knowing the preferred growing routine.
Fit can matter as much as holes
A tray setup works better when the pieces actually match. Many microgreens growers use a perforated tray inside a solid tray, so nesting compatibility matters: the top tray should sit securely without wobbling, bowing, or leaving a big gap that wastes space.
Standard 10 x 20 trays are popular because they fit common shelves, humidity domes, and grow-light layouts. Smaller trays can be easier to move and rinse, but they may create awkward gaps on a rack. Before buying several packs, it helps to compare tray sizes that fit the growing area, sink, storage shelf, and light footprint.
Good drainage is useful, but a tray that fits neatly is often the difference between a tidy routine and constant rearranging.
Quick tray decisions
Should microgreens trays have holes?
Holes are useful when drainage matters or bottom watering is part of the routine. They give excess water somewhere to go, especially with soil or coco mixes.
When does a solid tray make sense?
A no-hole tray helps contain water, soil, and mess on shelves or counters. It can also act as a shallow reservoir when a perforated tray sits inside it.
Is using both trays worth it?
For many indoor setups, a perforated tray nested in a solid tray is the most forgiving option. The top tray drains; the bottom tray catches runoff and allows gentle bottom watering.
What changes the decision?
Crop density, seed size, growing medium, airflow, and watering habits all matter. A careful light-watering routine can work in solid trays, while heavier watering favors drainage.
- Holes favor drainage and bottom watering.
- No holes favor containment, reservoirs, and cleaner shelves.
- A nested pair gives extra margin for small indoor growing spaces.
There is no single tray style that fits every batch. Perforated trays suit growers who want drainage and bottom watering, while solid trays suit tidy containment and reservoir-style watering.
For a simple indoor setup, the paired approach is often the easiest to manage: one tray with holes inside one tray without holes. The better choice still depends on the crop, medium, and how wet the routine tends to run.

I appreciate the balanced take here. A lot of microgreens advice treats holes vs no holes like a moral choice, lol.
For people growing in apartments, the solid bottom tray is non-negotiable unless you enjoy explaining sunflower runoff to your landlord.
What about tiny seeds like amaranth or basil? I’ve had them dry out on perforated trays because I’m scared of bottom watering too early, but solid trays got funky fast when I covered them for germination.
Maybe this is more about humidity domes than holes, but I’d love a quick rule of thumb for the really small-seeded stuff.
For tiny seeds, the early stage is usually the trickiest. I’d keep the surface evenly moist with gentle misting or very light top watering until they’ve rooted enough to wick from below.
If you’re covering the tray, check it daily and remove the cover as soon as germination is underway. Small seeds plus a sealed, no-hole tray can get stagnant quickly, especially in a warm room.
Seconding this. Basil in a closed solid tray was the only thing I’ve grown that smelled “off” before it looked bad. Airflow fixed more than changing trays did for me.
The fit issue is underrated. I bought perforated trays and solid bottom trays from two different brands, and they technically “nest,” but there’s barely any gap underneath. So the drain holes are basically sitting in runoff unless I prop them up.
Would you recommend looking for trays with ribs/spacing in the bottom tray, or is that overthinking it?
You’re not overthinking it. The air gap matters more than people expect. If the perforated tray sits flat against the solid tray, drainage is slower and roots can sit in collected water.
Ribs, raised channels, or even a slightly looser fit can help. Some growers add a thin spacer, but for repeated use I’d rather buy trays that naturally leave a little room for runoff.
I’ve been growing radish and broccoli in solid 10×20 trays because I don’t have a shelf system, just a kitchen counter. The article makes sense, but I feel like every guide says “just don’t overwater” like that’s an actual measurable instruction 😂
Is there a practical way to know when a solid tray has enough water without poking around and disturbing the roots?
I do the tilt test. If the tray feels heavy and you see water shine in the low corner, you’ve gone too far. Not scientific at all, but it saved me from making broccoli soup twice.
Do sturdier trays really make that much difference after a few batches? I’ve been using the flimsy ones and they work, but washing them is annoying because they bend and fling water everywhere. Not exactly a scientific complaint, but still.
I’m trying to decide if thicker trays are worth it or if I’m just being dramatic.
If I’m using coco coir mats instead of loose soil, does the advice about perforated trays still hold? I like the idea of bottom watering, but mats seem to wick differently and sometimes stay weirdly damp underneath.
Wondering if a no-hole tray is actually safer for mats since there’s less mess, or if that’s just asking for swamp tray syndrome 😅
Good question. Coco mats can work in either setup, but they do tend to hold moisture at the contact points with the tray. With mats, I’d still lean toward a perforated tray nested inside a solid one if you’re watering regularly, because you can lift the inner tray and check whether water is sitting underneath.
If you use a no-hole tray with mats, water very lightly and make sure there’s airflow. The risk isn’t just mess—it’s that hidden wet layer staying wet longer than the top looks.