
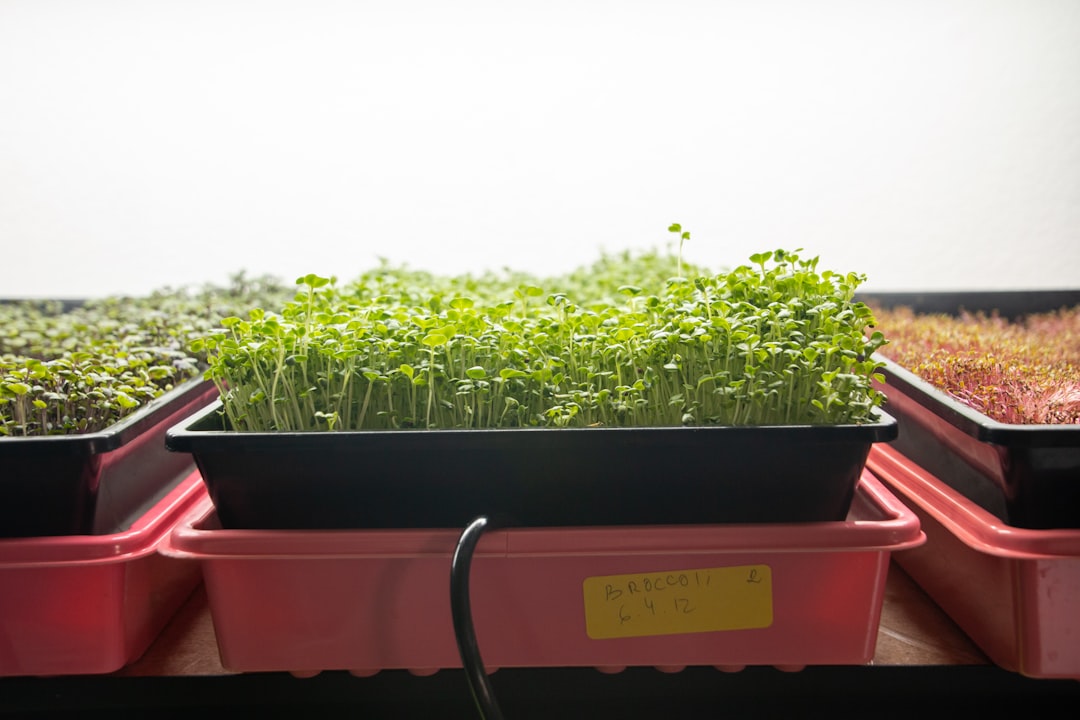
A tidy microgreen rack only works when every layer has room to breathe, grow, and be handled.
A shelf that looks perfect when empty can feel cramped the first time a tray of sunflower greens leans into the light bar. The real spacing is not just the gap between shelves; it is the stack of tray height, growing medium, crop height, light fixture, hanging hardware, and hand clearance.
For most small home setups, shelf spacing is better treated as a small design calculation than a fixed rule. Short crops such as radish or broccoli can fit comfortably in less vertical room, while peas, sunflowers, and taller mixes often need more headspace. A little extra clearance also makes watering, rotating trays, checking airflow, and harvesting less awkward.
- Standard 10×20 nursery trays are often about 2–2.5 inches tall before medium and greens are added.
- Many hobby growers start testing shelf gaps around 10–14 inches, then adjust for lights and crop choice.
Start with a practical spacing range
In most microgreen racks, shelf spacing means the distance from one shelf surface to the next shelf surface—not the open air gap after lights and trays are installed. That detail matters, because a 14-inch rack can feel much tighter once a tray, light fixture, hooks, and cords are in place.
A compact setup can sometimes work with 12 inches between shelves, especially with shallow trays, slim LED bars, and short crops like broccoli, radish, or arugula. This spacing saves vertical room, but it leaves less margin for reaching in, watering, and managing crops that stretch.
For many home growers, 14 to 16 inches is a more forgiving middle ground. It usually leaves enough space for standard 10×20 trays, low-profile lights, and comfortable daily checks without making the rack overly tall.
Choose 18 inches when growing taller varieties, using bulkier lights, or wanting easier hand access. The extra height can also improve airflow around the canopy, which is helpful in crowded or humid growing areas.
If unsure, 14–16 inches shelf-surface to shelf-surface is a sensible first layout. Move tighter only when the trays, lights, and crops are known to fit comfortably.
Measure the non-growing stack first
Before estimating crop height, it helps to measure the space already spoken for. A “10-inch tray” often describes its footprint, not the vertical space it uses once filled, covered, and lit.
Set up one shelf exactly as it will run, then measure from the shelf surface to the lowest obstruction above it. Include anything that hangs down, sticks up, or needs room to slide in and out.
Common items to include:
- Tray height: especially if using sturdy nursery trays or double trays.
- Growing medium: soil, mats, or pads can add more height than expected.
- Blackout gear: another tray, dome, board, or weighted cover.
- Lights: the fixture body, not just the light strip.
- Mounting hardware: chains, clips, hooks, zip ties, brackets, and cord strain relief.
A simple check is to place an empty planted tray setup on the shelf, lower the light to its planned position, and measure the remaining clear space. That number is the real starting point for crop growth and hand access.
Keep the light close to the crop, not just the shelf
Shelf spacing works only when it leaves the right light-to-canopy gap. That gap is the space between the underside of the grow light and the top of the microgreens, not the distance from one wire shelf to the next.
When lights sit too high above the crop, seedlings often reach upward instead of building sturdy stems. This can leave trays looking pale, leggy, or uneven, especially after blackout when growth is already moving fast. A closer light usually gives the crop a stronger signal, as long as heat and brightness stay comfortable.
Too close can cause its own problems. Tall pea shoots, sunflower, and brassicas may press into the fixture, bend sideways, or show dry, stressed tips if the light is warm or intense. For most small racks, a practical setup leaves room to adjust trays or lights as the canopy rises.
For a deeper look at fixture height, compare shelf plans with a sensible light distance for microgreen shelves before locking the rack in place.
Account for the light fixture itself
Shelf spacing is not just tray-to-light distance. The fixture body, power cord, hanging chains, clips, zip ties, and plug ends can all take up space that looked open on paper. A 2-inch-thick shop light hung from short chains may remove several inches before the crop even starts growing.
Slim LED bars make tighter shelves more realistic because they sit closer to the underside of the shelf above. They can also be easier to fasten flat with clips or tape-style mounts. When comparing low-profile grow lights for shelving, it helps to measure the total installed depth, not just the light’s advertised size.
Allow room for crop height changes
Microgreens do not all use the same vertical space. Radish, broccoli, cabbage, and many brassicas often stay fairly compact, especially when harvested young. They may fit comfortably in a tighter rack once the tray, medium, light, and hand space are accounted for.
Taller crops need more patience and more air above them. Pea shoots, sunflower shoots, popcorn shoots, and longer-grown greens can rise quickly, lean toward the light, or push into the usable space faster than expected. A shelf gap that works beautifully for radish may feel cramped when a pea tray is a few days from harvest.
Spacing can become a problem before leaves touch the fixture or shelf above. Crowded canopies may block airflow, make watering awkward, and force lights too close to tender growth. As a simple habit, growers often leave extra clearance for taller crops or keep one adjustable shelf position available for trays that outgrow the standard setup.
Check the working room
A rack that looks right on paper can still be irritating during a normal growing week. Each tray needs enough open space to slide forward without scraping leaves, catching on light cords, or bumping the shelf above. If a tray has to be tilted to remove it, the gap is probably too tight for easy use.
Watering is another practical test. There should be room for a small pitcher, spray bottle, or bottom-watering movement without soaking the lights or knocking nearby trays. Harvesting matters too: if the back row is hard to reach, the setup may work better with fewer trays per shelf or a little more vertical clearance.
When comparing shelving options for trays and lights, allow space for hands as well as plants. A comfortable rack is easier to keep clean, rotate, water, and harvest.
Before filling every shelf, place one planted tray on the rack and practice sliding, watering, and reaching the back corners.
Leave space for air to move
Spacing is not only about fitting trays and lights. In a stacked rack, especially one that is watered often, close shelves can trap moist air above the crop and under the light. That stale pocket can leave leaves slow to dry and make the whole shelf feel damp.
A little extra headroom gives warm, humid air somewhere to drift instead of sitting on the canopy. Open wire shelves also help because air can pass through the rack instead of being blocked by solid boards. For a dense setup, it is worth treating airflow between stacked shelves as part of the spacing plan, not an afterthought.
Small layout choices make a noticeable difference:
- Keep the sides of the rack fairly open rather than boxed in with storage.
- Avoid pushing trays tight against walls or plastic sheeting.
- Leave a small gap behind lights, cords, and trays where possible.
- Use a gentle fan nearby if the room tends to stay humid.
If a shelf smells musty or stays wet long after watering, the gap may be too tight for that setup.
After watering, look at the crop an hour or two later. Leaves that still look wet, with no obvious air movement around them, may need more clearance or a more open shelf layout.
Add the real heights, then round up
-
Tray and growing medium
Measure from the shelf surface to the top of the filled tray, not the empty tray rim.
Look forUse the filled, ready-to-grow height.AvoidGuessing from tray size alone. -
Light and hanging hardware
Include the fixture body, clips, hooks, cords, and any chain links that cannot be shortened.
Look forCount everything hanging below the upper shelf.AvoidMeasuring only the LED strip. -
Crop and light gap
Add the expected crop height plus the usual canopy-to-light space for that crop and fixture.
Look forAllow taller crops a few extra inches.AvoidPlanning around day-one seedling height. -
Hands and airflow
Leave a small working margin so trays can slide, watering feels manageable, and damp air is not trapped.
Look forAdd 2–3 inches when access is tight.AvoidFilling every inch with equipment.
Add: filled tray height + light/hardware depth + expected crop height + light gap + hand/air margin. Then round up to the next comfortable rack setting.
Compact setup: 2 in tray/medium + 1 in light + 4 in crop + 3 in light gap + 2 in margin = 12 in or a little more. Mixed crops: 2 in tray/medium + 1.5 in light + 7 in crop + 4 in light gap + 3 in margin = 17.5 in, so an 18 in shelf gap is more forgiving.Build in room to change course
The first rack rarely stays exactly the same after a few grows. Tray depth, blackout method, favorite crops, and watering style all tend to shift once the setup is being used. A grower who starts with fixed spacing may discover that a slightly taller tray or a lower-hanging light would have made the rack much easier to live with.
Adjustable shelves are worth considering for that reason. Even moving a shelf up or down by one notch can rescue a setup that feels cramped, especially when testing different compact microgreens equipment. Movable light chains, clip mounts, or ratchet hangers add the same kind of forgiveness.
A practical approach is to leave one shelf position unused at first, if the rack allows it. That small buffer makes it easier to experiment without replacing hardware later.
Use the smallest gap that still works
A compact rack is useful only if the plants, lights, and daily routine all fit comfortably. For many home microgreen setups, 14–16 inches between shelf surfaces is a forgiving starting point because it usually leaves room for trays, slim lights, young crops, airflow, and hands.
Spacing can be tightened when the setup has low-profile trays, thin LED bars, short crops, and easy access from the front. It can be opened up for peas, sunflowers, taller brassicas, bulky fixtures, hanging hardware, or anyone who wants less fiddling during watering and harvest. The practical standard is simple: keep shelves as close as the system allows, but not so close that growth, air movement, or handling becomes a daily compromise.

Question on the “leave space for air to move” bit: how much side clearance matters if the rack itself is wire shelving?
Mine is pushed into a corner with one side basically against the wall. I have about 16 inches between shelves, open front, and a small clip fan nearby. Trays are drying unevenly though — back left stays damp while front right dries fast. Is that a shelf spacing issue or just bad fan placement?
That sounds more like airflow pattern than vertical spacing. Sixteen inches is usually enough for most common microgreens if the light and trays aren’t crowding the canopy.
Since one side is against the wall and the rack is in a corner, air may be bouncing around the front while the back corner stays stagnant. Try aiming the fan across the rack rather than directly at the trays, and if possible pull the rack a few inches off the wall. Even 2–4 inches can help air move behind it.
Seconding the “pull it off the wall” thing. I moved mine like 3 inches out and the weird damp corner mostly disappeared. I thought it was too small to matter, but apparently air is picky.
The additive spacing formula is the most useful part here. I finally measured tray + soil + blackout tray + light fixture instead of just saying “my rack is 12 inches so I’m good.” Spoiler: I was not good.
My “12 inch” setup had maybe 7.5 inches of real growing space after the light body and hooks. No wonder my peas looked offended.
Step about keeping the light close to the crop is where I’m struggling. I have 14-inch gaps, 1020 trays, and cheap LED shop lights on chains, but my broccoli is still stretching like crazy.
If I raise the trays closer to the lights it fixes stretching, but then sunflower shoots get crowded fast. Is this just one of those “don’t grow everything on the same shelf” situations?
Pretty much, yes. Broccoli and similar small greens usually do well with the light kept fairly close, while sunflower/pea shoots need more vertical breathing room as they bulk up.
If your shelves are fixed at 14 inches, try grouping crops by height: compact brassicas on one shelf with the lights closer, taller shoots on another with a bit more clearance. You can also use a simple riser under shorter trays instead of moving the whole light every time.
I had the exact same issue. What helped me was putting sunflower on the top shelf where there’s no shelf above it, and keeping broccoli/radish on the lower shelves. Not fancy, but it stopped the jungle situation 😂
I’m a little skeptical of 10–12 inches unless you’re only doing very short crops or using super slim LED strips. I tried a compact setup in my pantry and it was technically possible, but watering was annoying and airflow got nasty unless I kept a fan running all the time.
14–16 inches seems like the sweet spot to me. Less Instagram-perfect, more human-hands-can-fit-in-here.
I switched my rack from 12 inches to 15 inches between shelf surfaces and it made a bigger difference than I expected. The trays still fit fine, but now I can actually slide them out without scraping the light bars or doing that weird sideways wrist move.
For anyone using blackout domes, measure those first like the article says. That was the piece I kept forgetting.
This worked! I rebuilt my little basement rack with 18-inch gaps for the bottom two shelves and 14-inch gaps up top. Pea and sunflower trays go lower, radish and broccoli go higher.
Not as many shelves overall, but I’m losing fewer trays to mold and I don’t dread harvesting anymore. Worth it.