
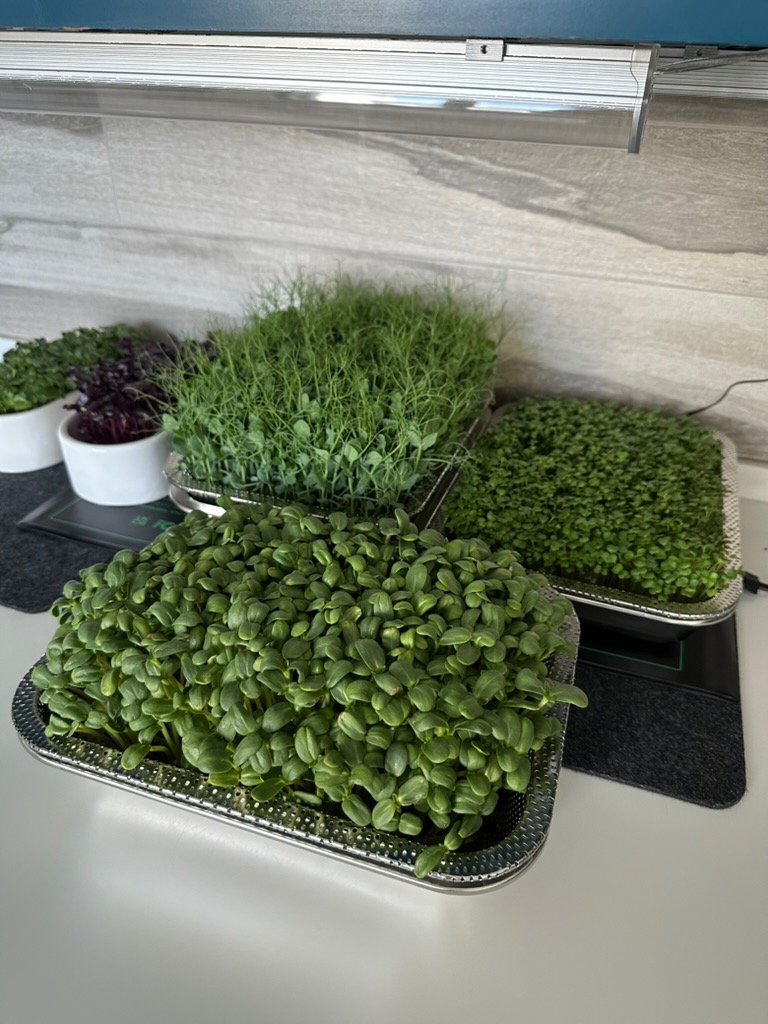
A forgiving crop can make the first tray feel less like a test and more like a tiny harvest in progress.
Seeds hit the damp mat, the lid goes on, and suddenly every glance at the tray feels loaded. Nothing has gone wrong, but the clock feels loud: a few days to sprout, a few more to green up, and hopefully something crisp enough to snip before second-guessing takes over.
The easiest first tray is rarely about perfect humidity, exact lighting, or a flawless misting routine. It is usually about choosing seeds that tolerate small mistakes and still put on visible growth. Peas, radish, broccoli, and sunflower tend to give beginners more grace than fussier crops, with sturdy sprouts and clear signs of progress. That early momentum matters; a tray that grows plainly is easier to learn from than one that demands guesswork from day one.
- Fast-germinating crops often show activity within 2–4 days when kept evenly moist and warm.
- Larger seeds such as peas and sunflower make it easier to spot dryness, mold, or uneven coverage early.
What “easy” looks like in a first tray
-
Quick, visible germination
Beginner-friendly microgreens usually show life within a few days, so problems are easier to spot before the tray feels like a mystery. Fast sprouting also keeps the waiting period short and encouraging.
Look forSeeds that germinate evenly and visibly in the first several daysBe wary ofSlow or patchy crops that make normal beginner uncertainty feel like failure -
Strong seedlings that stand up
Some crops push through the soil or mat with sturdy stems and broad early leaves. That vigor helps them recover from small mistakes in seeding depth, blackout timing, or tray handling.
Look forThick, energetic growth that forms a steady green matBe wary ofDelicate seedlings that collapse easily or need very exact conditions -
Simple light and water needs
An easy tray does not demand perfect grow lights or a flawless watering rhythm. It can handle a bright windowsill or basic light setup, plus the occasional uneven watering day.
Look forCrops that stay upright with basic light and tolerate slightly imperfect moistureBe wary ofVarieties that stretch fast, dry out suddenly, or sulk after minor overwatering -
Seeds and harvest that match the patience level
Tiny seeds are simple to scatter and often need no soaking, but they can clump if sown too heavily. Larger seeds are easier to see and handle, though some benefit from soaking, rinsing, or more careful spacing.
Look forA seed size and harvest style that feels manageable from sowing to cuttingBe wary ofFussy prep, crowded large seeds, or greens that are awkward to harvest cleanly
Good first-tray crops to start with
For a first tray, common vigorous seed types are usually more helpful than rare colors, tiny specialty varieties, or complicated mixes.
Choose by what feels easiest
“Easy” is not one single trait in microgreens. A tray that feels simple for one beginner may feel fussy for another, depending on what makes the process rewarding.
For quick feedback, radish and mustard are satisfying because they sprout fast and show strong early movement. They suit anyone who might lose interest if the tray looks unchanged for several days.
For mild flavor, broccoli, cabbage, and kale are gentler choices. They are often easier to use in sandwiches, eggs, rice bowls, or salads without overpowering the meal. For more ideas in that direction, it can help to compare microgreens with mild, beginner-friendly flavors.
For easy observation, peas are especially fun. Their larger seeds, thick shoots, and curling tendrils make growth easy to notice, which can make them appealing for children or classroom-style projects.
For a fuller-looking harvest, peas and sunflower shoots often feel more substantial than tiny brassica greens, though they may need a little more space and attention.
A first crop does not need to win every category. The most satisfying choice is usually the one that matches the grower’s main reason for starting.
Seed quality matters more than it seems
A first tray can look “difficult” when the real problem started in the packet. Old seed, treated garden seed, or a vague label can lead to patchy germination, uneven growth, or uncertainty about whether the crop is behaving normally.
For beginners, sprouting seed or microgreens seed is usually simpler because it is commonly sold for edible young growth and often comes in practical amounts. A clear crop name also helps: “broccoli microgreens” is easier to trust than a packet that only says “greens mix” with no details. For a broader starting point, compare which microgreens seeds make sense to buy first before filling a cart.
Garden packets can still work, but only when the seed is suitable and untreated. Some garden seeds are coated or treated for outdoor planting, and those are not a good match for trays grown indoors for harvest at a young stage. Recent packaging or a visible packed-for date can also reduce guesswork, especially with crops where strong germination makes the tray feel successful from day one.
A beginner-friendly packet usually has:
- Untreated or food-use-friendly labeling
- A specific crop name, not just a vague mix
- A recent date or current-season packaging
- Enough seed for an even tray, not just a tiny sprinkle
When in doubt, seed sold specifically for sprouting or microgreens removes more uncertainty than a random garden packet. Clear labeling is not fancy — it is practical.
Keep the setup simple enough to read
A low-complexity microgreen setup does not need to look polished. It only needs to make moisture, light, and growth easy to check each day. A shallow tray with drainage holes is a good starting point because extra water can escape instead of pooling around the roots.
Place that tray inside a second solid catch tray to protect the windowsill or shelf. Fill it with a pre-moistened seed-starting mix, coconut coir, or a microgreen mat. The medium should feel evenly damp, not muddy; clumps of dry material often lead to patchy germination.
The basic pieces are modest:
- Shallow growing tray with drainage holes
- Catch tray with no holes
- Pre-moistened medium or grow mat
- Bright window or simple grow light
- Germination cover such as an upside-down tray, lid, or loose blackout cover
A bright window can work for many beginner crops, especially when the tray can be rotated if seedlings lean. A basic light is useful when indoor light is weak or inconsistent. Some simple beginner grow kits bundle these parts together, though a homemade setup can be just as workable if it keeps drainage and light easy to manage.
During germination, a cover helps hold moisture near the seeds and keeps the surface from drying too quickly. Once the sprouts lift the cover or show steady growth, uncovering them and moving them into brighter light keeps the process easy to observe. Consistency matters more than perfect gear: evenly damp medium, decent light, and daily checks solve many first-tray problems early.
A calm first-tray routine
-
Day 0: Sow, press, and cover
Spread soaked or dry seed according to the crop, then press it gently into the damp medium so seed and moisture stay in contact. Add a cover or second tray to keep the surface dark and evenly moist while germination begins.
-
Check once a day
A quick daily look is more useful than memorizing an exact schedule. The surface should look damp, not shiny-wet, and the seeds should smell fresh and earthy rather than sour.
-
Uncover when sprouts are pushing up
When most seeds have cracked and the tiny stems are lifting the cover, the tray is ready for air and light. A few late seeds are normal; waiting for every single one can leave the early sprouts stretched and pale.
-
Move to bright light
Place the tray near a bright window or under a simple grow light once the cover comes off. The aim is steady, even light so the greens turn upright and begin to color up.
-
Water gently from below if possible
Adding water to the catch tray lets the medium drink without flattening tender stems. If watering from above is the only option, a fine mist or gentle pour around the edges is kinder than a heavy splash.
-
Harvest when the tray looks ready
Most beginner crops are cut when they have open seed leaves and look full enough to enjoy. Timing can vary with room temperature, light, and seed age, so appearance is often a better guide than the number on a packet.
Small adjustments are part of the process. A tray that is a little uneven can still teach plenty and often still produce a useful harvest.
Small problems do not always mean a ruined tray
Patchy germination is common, especially with older seed, uneven sowing, or dry corners.
If most of the tray is growing and there is no bad smell or fuzzy spread, the healthy areas can usually continue. Next time, sow a little more evenly and check that the whole surface is damp before covering.
Tiny white root hairs often appear near the base of young stems, especially on radish and brassicas.
Root hairs cling close to each stem and disappear when misted. Mold tends to spread across the surface, look webby, and may come with a stale smell. More airflow and less standing moisture help either way.
Leggy growth usually points to low light or a tray left covered too long.
Once sprouts are upright, they need brightness to green up and thicken. Moving the tray closer to a light source and uncovering promptly can improve the next few days of growth.
Drooping can come from either dryness or soggy roots with poor airflow.
The medium tells the story better than the leaves alone. Dry, pale mix needs gentle watering; heavy, wet mix benefits from draining, airflow, and a pause before more water.
Let one good tray lead the way
A first successful tray is worth repeating before adding complexity. Growing the same crop once more helps the rhythm settle: soak or sow, cover, check moisture, uncover, light well, and harvest at the right size.
After that, progress feels calmer when only one thing changes at a time. Try a quicker crop, a milder flavor, or a small variety pack, but keep the tray, light, and watering routine familiar. Small, steady experiments make microgreens feel less like a project and more like an easy kitchen habit.

Can you explain the fuzz thing a little more? I tried broccoli once and panicked because there were white hairs near the roots. I threw the whole tray out because I thought it was mold.
Now I’m wondering if I murdered a perfectly fine tray in cold blood.
I did the exact same thing with radish 😂 Root hairs can look VERY suspicious the first time. Mold usually looks more webby across the surface and smells musty, in my experience.
Nina’s description is a good practical distinction. Root hairs usually cling close to the stems/roots and appear evenly around healthy sprouts, especially right after germination. Mold tends to spread across the surface, look more cobweb-like, and often comes with stale air or an off smell.
If you’re unsure next time, improve airflow, avoid overwatering, and give it a few hours under light. Root hairs will remain associated with the plant; mold usually keeps spreading.
The “choose by what feels easiest” part helped me. I’m doing this with my 7 year old and I think visible growth is probably more important than flavor at first. He will not care that broccoli is nutritionally superior if it looks like dirt for 3 days lol.
This was actually the first article that made microgreens sound less like a tiny science project and more like something I could do on my counter.
Question though: when you say radish is forgiving, does that mean it can handle being a little overwatered? That’s usually where I mess up with seedlings 😅
Radish is forgiving in the sense that it germinates quickly and usually pushes through small mistakes, so you get feedback fast. It can tolerate slightly uneven moisture, but it still doesn’t love sitting in a soggy tray.
For a first tray, aim for “damp sponge” moisture rather than wet mud. If the catch tray has standing water for long periods, pour it off and let the tray breathe a bit.
I’m skeptical about peas being beginner friendly only because the seeds are huge and it feels like they’d need a whole different setup. Do you soak them first or just put them straight on the medium?
Fair skepticism! Peas are beginner-friendly because they’re easy to handle and produce a full-looking tray, but they do need a little different treatment than tiny brassica seeds.
I’d soak pea seed first, usually 6–12 hours, then spread them thickly but not piled on top of each other. They also appreciate a bit more vertical room and steady moisture because the seed is larger.
I wish seed quality was emphasized more in beginner guides, so I appreciated that section. I bought random “salad mix” seeds from a hardware store and half the tray did nothing.
Is “untreated” the main thing to look for, or should the packet specifically say microgreens/sprouting?
Untreated is the minimum requirement, but for first trays I’d strongly prefer seed labeled for microgreens or sprouting. Those packets are usually selected with dense sowing and edible young growth in mind.
Also check that the crop is clearly named, the packet is recent, and the seller has decent turnover. Old or vague seed mixes can make a beginner think they did something wrong when the seed was the weak link.
The calm routine idea is nice, but I still feel like I need a schedule or I’ll overthink it. “Uncover when they’re ready” sounds obvious until you’re staring at a tray like it owes you rent.
Maybe a photo guide for what ready-to-uncover looks like would be helpful?