

A shelf can look roomy until trays, lights, and a fan move in.
I’ve nearly bought racks this way: 5 tiers, decent price, done. Then a 10×20 tray overhangs a 14-inch shelf, the light steals a few inches, and the fan turns that “extra” level into a squeeze.
Now I shop the system, not the rack: tray footprint, light thickness, hanging space, and a little room to water. Fit beats tier count. A shorter rack with honest spacing can be more usable than a taller bargain packed tight.
Measure first, then shop
-
Measure one tray
If I’m still comparing tray sizes for a shelving unit, I note the tray’s outside width, depth, and any rim overhang.
-
Map trays onto one shelf
I sketch one shelf and fit trays on paper, leaving a little side gap so they slide in and air can move.
-
Check the floor space
Then I measure the room footprint, plus space for cords, a water bin, and enough standing room in front.
-
Calculate true growing height
Shelf spacing looks bigger until lights hang down. I add tray height, crop height, light thickness, and a small gap above the canopy.
-
Cross off bad fits fast
Those numbers let me reject racks that are too shallow, too narrow, or too short before I compare finishes or price.
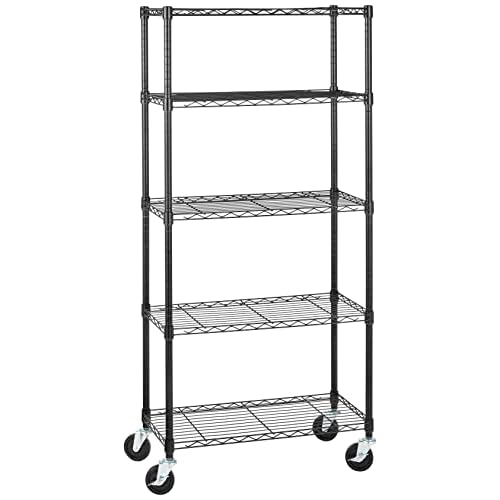
I also check total rack height with casters installed. Wheels can be handy, but they may cost me one usable shelf level in a low room.
What actually fits
Retail dimensions are usually nominal: outside width × depth × height. What I care about is usable shelf space—the flat area left after posts, shelf lips, and any taper at the corners.
A shelf sold as 48 × 18 inches may give a little less in practice. I usually subtract:
- 1–2 in. total width for posts or corner flare
- 1/2–1 in. depth if the front or back lip steals tray room
- extra height for light bars, hangers, and a bit of hand space
That math matters because two 1020 trays do not need just 20 × 40 inches on paper; they need a little wiggle room so I can set them down, slide them out, and water without scraping the frame.
I also leave air around the rack itself. Even a shelf that fits the trays can feel cramped if the unit sits tight to a wall or another rack. A few inches at the sides and back can help fans move air and make daily access much less annoying.
Add the rack footprint to the space you want around it:
side and back gap for airflow front space to pull trays out clearance for cords, lights, and your handsMore tiers can look efficient, but they don’t always grow more
Only the levels with enough tray, dome, light, and hand room usually stay useful.
In my experience, blackout domes and light hardware eat vertical space fast. A shelf can fit a tray on paper and still be annoying to seed, water, or lift without bumping something.
A little extra headroom can help trays stay easier to manage and more consistent.
When shelves are cramped, I’m more likely to tilt trays, brush leaves, or rush watering. A bit more space between shelves also leaves room for airflow and light hangers.
Adjustable shelving is usually a safer bet because microgreens need different heights at different stages.
A stacked blackout tray, a tray under a dome, and a finished tray under lights rarely want the same clearance. Small shelf adjustments make it easier to trade one extra tier for comfort and fixture distance.
Choose materials that stay calm around water
In my own setup, material matters more than a flashy tier count. Microgreens mean damp trays, splashes, and frequent wipe-downs, so I lean toward surfaces that stay steady and clean up fast.
How common materials behave
- Coated steel wire: usually the easiest balance of airflow, strength, and cleanup. It dries quickly, though chipped coating can invite rust over time.
- Plastic or resin: won’t corrode, but some lighter units flex more when trays are fully watered.
- Wood or MDF: can look nice, yet repeated moisture can stain, swell, or hold smells.
What I notice most in daily use is wobble. A tall, skinny bargain rack can feel fine empty, then get twitchy once lights, cords, and soaked trays are added. When I slide a tray out one-handed, I want the shelf to feel boringly solid.
A few details tend to inspire more confidence:
- thicker steel posts
- leveling feet for uneven floors
- adjustable shelves
- wipeable finishes
A practical steel-wire option
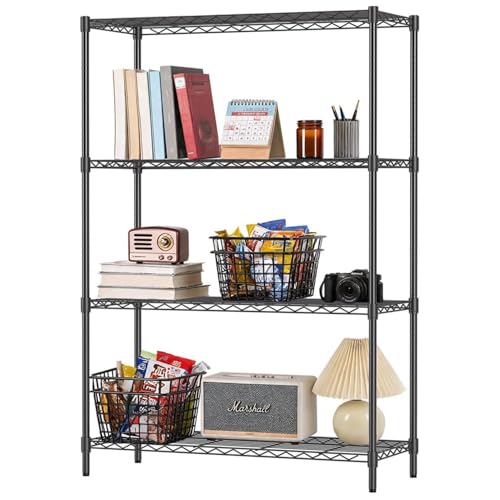
This 36″ x 14″ x 72″ rack uses black-finished steel wire shelves with 1-inch shelf adjustment and leveling feet. Amazon lists it at 350 lb per shelf evenly distributed, with tool-free assembly.
For a microgreens corner, that combination suggests a sturdier feel than very cheap tall racks. I’d still double-check the 14-inch depth against your tray and light setup before buying.
A rack can have a big weight number and still feel awkward in use. Stability while pulling trays, wiping shelves, and nudging lights often matters more than raw capacity.
Lights before shelf
-
Coverage and thickness
A tray may fit on paper, then lose usable height to the fixture body and hangers.
Look forSlim lights with even tray coverageAvoidBulky fixtures and edge shadowing -
Mounting and cords
Daily use is easier when the shelf gives you simple anchor points and a clean cable path.
Look forEasy hooks, clips, and cord routingAvoidAwkward hanging and dangling cords
Rack parts that shape lighting
Kyle Weiler shows how shelves, lights, and a timer work together, which helps when comparing grow lights that work on shelves.
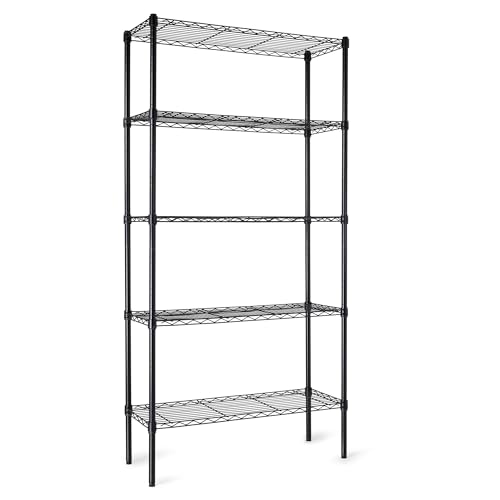
Flexible shelf spacing
This wire unit looks handy if you want adjustable tiers, but I’d still confirm where lights, hangers, and cords will actually sit.
Air needs room too
Airflow changes a shelf’s real footprint more than I expected. A rack that neatly holds four trays can start feeling cramped once I make room for a clip fan, cords, and a little breathing space at the sides. If you’re working airflow into a shelf setup, I’d count that space as part of the plan, not as an extra.
I usually leave:
- Open sides instead of boxing the rack against furniture
- A few inches from the wall so damp air can move away
- Fan room above or beside trays, aimed across the canopy rather than straight down
A compact layout can still be workable, but it often stops being convenient once lights, watering access, and moving air all compete for the same inches.
Even a small fan can steal tray access. I like to place the fan, light, and one tray together before choosing the final rack width.
Shelf styles I’d match to real-world grows
Once I add lights, cords, a small fan, and space to water, a tall rack usually occupies more of the room than its measurements suggest. In a bedroom corner or pantry, a shorter unit can feel easier to live with day to day.
-
Read the inside measurements
I check width and depth between posts, not just overall rack size. Posts and shelf lips can steal tray room.
-
Find the shelf gap in writing
Photos can hide cramped tiers. If I only see “adjustable,” I look for actual clearance or hole spacing.
-
Read load numbers like fine print
I want both per-shelf and total capacity, plus whether the rating assumes evenly spread weight.
-
Match photos to the parts list
Casters, liners, hooks, and lights are often styled in photos but sold separately. I trust the included-parts section first.
-
Use photos as clues, not proof
Wide-angle shots can make racks look roomier. I look for straight-on images with trays or real measurements for scale.
If a seller never states usable shelf size or shelf-to-shelf clearance, I assume I’ll be guessing. For microgreens, that usually means more surprises than savings.
How I turn notes into a shortlist
-
I start with tray count
I write down how many trays I want on each level, using the tray’s real outer size.
-
I remove lost space
I account for posts, shelf lips, light thickness, and fan clearance before I trust any rack dimensions.
-
I rule out awkward heights
If watering, domes, or harvest access look cramped, I drop that option even if the tier count looks good.
-
I keep only a few contenders
When a shelf fits my trays, lights, airflow, and room access on paper, it makes the shortlist.
- I know my tray size and trays-per-shelf.
- I know my usable shelf height after lights.
- I know where fans, cords, and wall gap will go.
At this point, I’m not hunting for every possible rack anymore. I’m choosing between the few that fit my real measurements and daily workflow.
If two shelves still look close, I compare included parts, adjustability, and how easy the setup will be to light and clean.

I’m glad you mentioned materials because so many buying guides act like “metal good, plastic bad” and leave it there.
I had a plastic shelf bow a little in the middle after a while, but I also don’t want something that starts rusting the second I spill water. Is coated wire steel still your default choice for a small home setup, or only once people go bigger?
For most small home grows, coated wire steel is still my default. It tends to balance airflow, cleanup, and stability better than most alternatives, especially if you’re moving trays in and out often.
The key is not just the material label, but the overall build: post thickness, shelf support, coating quality, and whether it has leveling feet. A flimsy steel rack can still be annoying, while a well-built one feels much calmer around water and daily use.
Same experience here. Mine didn’t rust, but the cheap plastic one got wobbly way before I expected.
When you say light thickness can matter more than raw tier count, how much clearance are most people realistically losing?
I keep seeing racks advertised with 5 tiers and it looks efficient, but once you hang lights, add a little air space, and maybe use a dome early on… I can’t tell if those top numbers are basically marketing.
In many cases, they kind of are. The written tier count only tells you how many shelf levels exist, not how many are comfortable to use for growing.
Once you subtract the light itself, hanging hardware, cord routing, and the crop space you want under the light, the usable gap can shrink fast. Add a dome for germination and some racks suddenly become awkward rather than productive.
This matches what I’ve been running into shopping online. The photos always make the shelf gaps look huge, then you read the specs and realize the “adjustable” spacing still doesn’t leave much room once the lights are in.
One thing I still don’t understand: when a listing gives a load rating, how seriously should I take it for microgreens? The trays themselves aren’t insanely heavy, but water adds up and some of these racks look kinda flimsy.
This was super helpful, but I’m still stuck on the “nominal size vs actual fit” part.
If a rack says 48×18, is there a quick rule of thumb for how much space I should assume gets eaten by posts/lips before I even bother ordering? I’ve already returned one shelf unit because my trays technically fit on paper and then… didn’t 😅
Yep — and that’s a very common frustration. A good rule is to ignore the headline size and look for the inside shelf dimensions if the seller provides them.
If they don’t, I usually assume you’ll lose some width and depth to posts, shelf rims, and how the shelf is shaped. That’s why measuring your tray outer dimensions first is so important. If the fit is already close on paper, it’s usually safer to pass.
I learned this the hard way too. “Fits 4 trays” apparently meant “fits 4 trays if you believe in miracles” lol.