
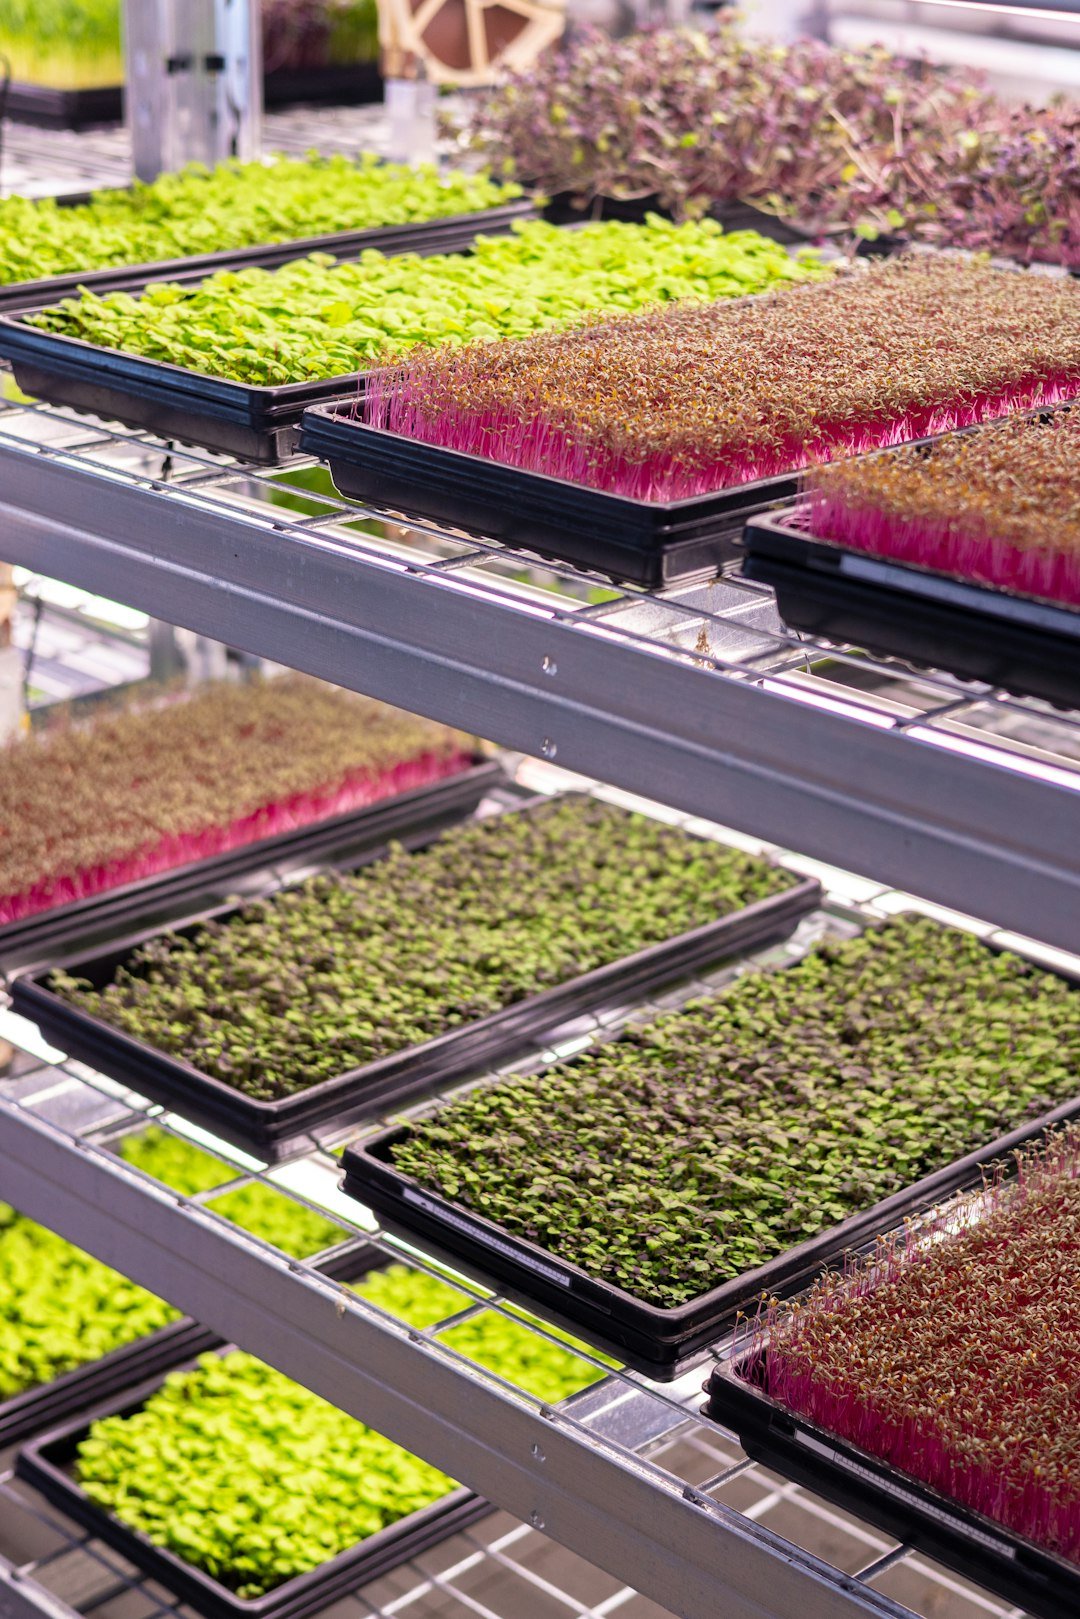
A tray only works if your hands can work around it.
I’ve set a standard 10×20 tray on a shelf and thought, perfect—then realized I had no easy way to lift it, water it, or cut greens without bumping the wall. A tiny tray can solve that crowding, but it can also feel small fast if I’m reseeding every few days.
So I try not to start with the tray size I keep seeing online. I start with the space I can actually use: where the tray will sit, where excess water can drip or drain, and whether I have enough room to harvest without twisting the whole setup sideways. Usable space matters more than tray format. Once I know that real footprint, the right size usually becomes much clearer.
- A 10×20 tray usually needs a little extra clearance on at least one long side for watering and cutting.
- Small trays can fit awkward spots well, but they often mean more frequent sowing for the same total harvest.
- Shelves, windowsills, and counters each limit tray size differently because access matters as much as width.
Measure the real growing zone
-
Clear the area first
I like to move lights, mats, bins, and anything loose before measuring. It’s much easier to see the true edges of the space.
-
Measure where the tray actually sits
Check width, depth, and height at shelf level, not just the outside frame. Shelf posts, front lips, and side rails can quietly steal usable inches.
-
Draw a clean rectangle
I mark the largest simple rectangle that stays clear of cords, wall bumps, power strips, and light hangers. Painter’s tape works well for this.
-
Leave working clearance
A tray rarely uses only its listed size. I usually leave a bit of extra room to slide trays, lift covers, and pour water into a bottom tray without splashing.
-
Mock it up before buying
A cardboard cutout or empty box is a quick test. If it catches on corners or blocks my hand, I know the fit is tighter than it looked.
Even a roomy shelf can tighten up fast once everything is in place.
upright posts and shelf lips cords, timers, and power strips wall trim or outlets behind the rack blackout or humidity cover overhang enough hand space to lift trays in and out a little extra room for bottom watering and drip catch traysWhat those tray names usually mean
1020
Usually the standard full-size tray. The name points to about 10 by 20 inches, but the actual outer size can vary a little.
1010
Roughly half of a 1020. It fits smaller shelves nicely, though some brands run slightly wider or longer.
5×5
A small square tray, often used for test batches or a windowsill. The rim can make the outside bigger than the label suggests.
Shallow tray
Often around 1 inch deep. I like these when I want less soil and less weight, but sellers do not all mean the same height.
Deep tray
Often around 2 to 2.5 inches deep. It can hold more soil or water, yet “deep” is still a loose category, not one exact size.
Two listings can both say 1020 and still differ in:
outer lip width corner shape tray depth whether the measurement is inside or outsideI treat the name as a starting point, then I still check the listed outer dimensions.
A tray has to work when it’s full, wet, and in your hands
-
Depth changes the watering rhythm
I’ve found shallow trays dry faster and stay lighter, while deeper ones hold a bit more moisture but can feel bulkier in tight shelves. The right depth is often about how often you want to fuss with watering, not just root room.
Look forDepth that matches your watering style and shelf clearance.AvoidPicking depth by dimensions alone. -
Rigidity matters once the tray is soaked
A flimsy tray can bow when you lift it after bottom watering, especially with a dense mat and saturated soil. That’s less of a problem on paper than in the sink.
Look forStiff sides and a base that stays flat when wet.AvoidThin plastic that twists under load. -
Wet weight affects daily convenience
Two trays with the same footprint can feel very different after watering. Heavier setups are fine on sturdy racks, but they’re less pleasant to rotate, drain, or carry to a counter.
Look forA size and material you can move comfortably when full.AvoidA tray that is manageable only when empty. -
Stacking, nesting, and drainage work together
Some trays stack neatly for blackout or storage, while others wedge tightly and are annoying to separate. Drain holes, slot patterns, and matching undertrays also change cleanup and overflow control.
Look forEasy separation, stable stacking, and a drainage style that suits your routine.AvoidTight nesting and hole patterns that make watering messy.
A tray that technically fits the shelf can still be awkward every day. I usually picture the full cycle: soak, drain, move, stack, rinse, and store.
If you’re still comparing different drainage setups, it helps to imagine the sink routine too. Tiny differences in hole pattern, matching bottom trays, and how tightly trays nest can change cleanup more than half an inch of width.
What Fits Where at Home
What tray size usually works on a windowsill?
On many sills, a narrow tray feels easier to live with than a full 10×20. I usually picture window latches, curtain space, and how far the greens can grow before they start pressing the glass.
What feels reasonable on a kitchen counter?
A counter often suits a medium tray, something around the 10×10 range, because it can give a decent harvest without taking over the whole work zone. I find that shape easier to rotate, rinse, and move aside than a long standard tray.
When does a full 10×20 tray make more sense?
This is where a wire rack can really help. If the shelf truly fits it, one standard size tends to be simpler for lights, bottom watering, and stacking, though it’s less forgiving if I want to rearrange things later.
What about a tiny apartment corner?
In a tight corner, smaller trays are usually more flexible than one large tray. They can tuck around outlets or storage bins, but the trade-off is more separate pieces to water and usually less harvest from each round.
If a spot changes jobs during the day, I lean smaller. If it stays a dedicated grow area, larger matching trays often feel more efficient.
Busy windowsill or counter: narrow or medium trays are easier to place and move. Wire rack: standard trays can make lighting and watering feel tidier. Very small footprint: I’d first compare compact countertop kit options instead of forcing a tray into an awkward gap.A tray can fit and still feel cramped
I’ve learned that a tray can technically fit a shelf and still be annoying every single day. The missing piece is everything around the tray: lights above it, cords beside it, a blackout dome on top, and enough room for my hands to water, rotate, and lift it out.
If I only match tray width to shelf width, I usually end up with a setup that feels tighter than expected. Even an extra inch or two can matter once the light hangs lower, the shelf wire catches on a cover, or a plug sits right where I want to slide the tray.
What to check beyond tray size
- Light clearance: hanging lights and chains can steal vertical room fast.
- Blackout height: stacked trays or domes need extra headroom during germination.
- Cord path: power cords can block corners or make trays harder to move.
- Hand access: I need space to reach in without scraping knuckles or tilting a wet tray.
- Front overhang: some shelves have lips or poles that make removal awkward.
A quick test helps: I picture myself seeding, covering, watering, and harvesting in that exact spot. If any step feels cramped in my head, it usually feels worse in real life.
For me, a comfortable setup is rarely the one with the largest tray that fits. It’s the one I can actually use without fuss.
How tray size changes the routine
I’ve found tray size changes the pace of growing more than the math.
- Small trays feel low-pressure. I like them for new seeds, odd mixes, or when I’m not sure a spot will work. If a batch flops, I lose less seed and less time. The tradeoff is a quicker harvest cycle: I’m seeding and cleaning more often.
- Medium trays are the easiest middle ground for me. They give enough yield to feel worthwhile without becoming heavy, drippy, or awkward to rotate under lights. If I want variety, this size usually keeps that possible.
- Standard 10×20 trays make sense when I want fewer, larger batches. But once they’re wet, they feel noticeably heavier, and one tray can claim a whole shelf zone. That can be great for a steady favorite crop, less great for experimenting.
A simple way to choose: grow small if you like testing, medium if you like flexibility, and standard if you prefer a calmer, bigger-batch harvest rhythm.
Matching tray size to your setup
If I’m starting very small
For a dorm shelf, narrow sill, or one open corner, I usually lean toward trays around 5×5 to 5×10 inches. They’re easier to rotate, rinse, and tuck under a modest light. The tradeoff is straightforward: less waste if a crop flops, but also smaller harvests and more frequent reseeding.
If I want an easy countertop routine
For kitchens and utility counters, 5×10 or 10×10-ish trays often feel like a comfortable middle ground. I look for good rigidity, a matching catch tray, and enough depth to hold roots without feeling bulky. These sizes can stay manageable when wet, though they still claim visible counter space and can start to feel cluttered if I run several at once.
If I’m growing on shelves
On wire racks or dedicated shelves, 10×20 trays often make practical sense because lights, mats, and inserts are fairly easy to find. I pay extra attention to outer dimensions, handle room, and whether the tray stays stiff when lifted full. The compromise here is commitment: shelf setups can be efficient, but they usually ask for more clearance, tidier water management, and a bigger harvest rhythm than many casual growers actually want.
-
Measure the true opening
I note width, depth, and reach.
-
Mock up the footprint
Cardboard shows whether lights, cords, or covers steal space.
-
Choose for the routine
I pick a tray I can lift wet, wash fast, and harvest comfortably.
-
Check the whole setup
If I’m still gathering supplies for growing microgreens at home, I match trays with bottoms, covers, and shelving.
Tray choice feels easier when it fits the space, the workflow, and the other gear at the same time.

This was helpful, but I’m still confused about the “real growing zone” part. If my wire shelf says 24×14, do I subtract space for the shelf poles and the lip before deciding on trays?
I keep almost buying 10x20s because that seems like the default, then realizing my light cords and the back bar eat up more room than I think 😅
Yes — measure the usable rectangle, not just the advertised shelf size. Shelf posts, lips, light hangers, cords, and even the room your hands need to lift a tray all reduce what truly fits.
A simple way to check is to mark out the space with cardboard cut to the tray’s outer dimensions, then test whether you can slide it in, remove it, and water it comfortably. That usually reveals problems faster than the shelf spec does.
Cardboard mockups saved me from buying the wrong trays twice. Sounds silly, works great.
Good breakdown, but I’m still skeptical about windowsills being practical for anything beyond tiny trays. Between the window latch, the trim, and uneven light, a tray can “fit” on paper and still be awkward in real life.
Would you personally skip 10×10 on most windowsills and go straight to 5×10-ish sizes?