
A compact tray system I keep reaching for
I bought these stainless steel trays because I wanted a reusable microgreens setup that could live on the kitchen counter and handle water every day without feeling disposable.
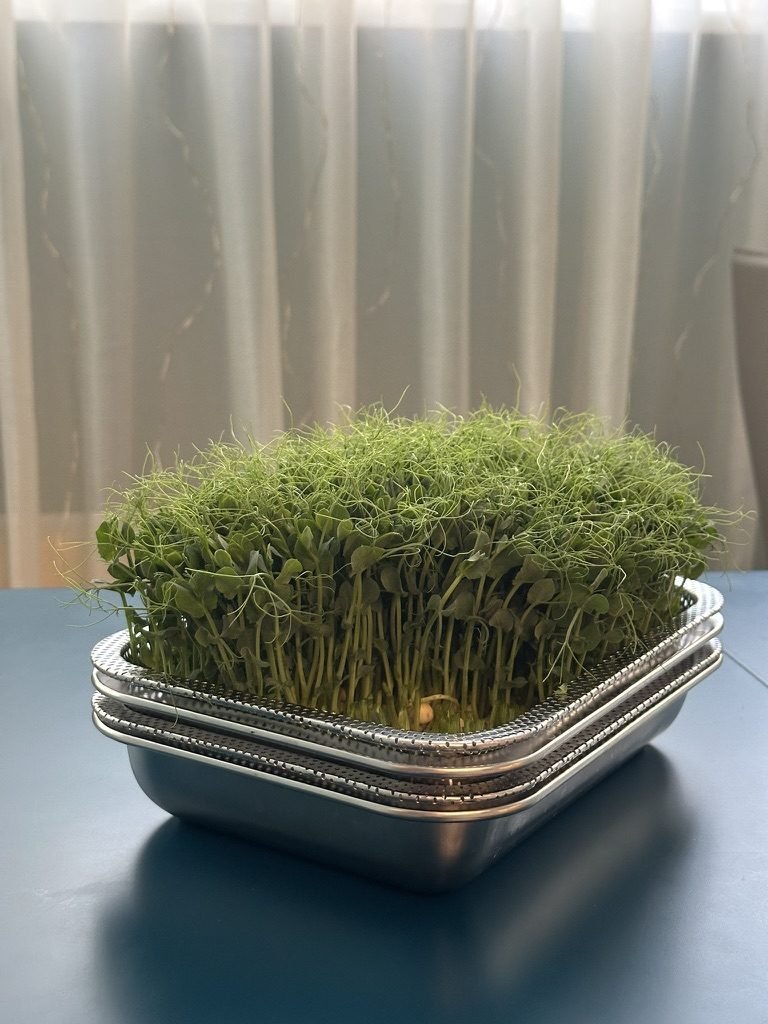
After repeated batches, the part I appreciate most is the two-layer design. Roots grow through the perforated tray into the reservoir below, so once they are established, watering becomes much less hands-on.

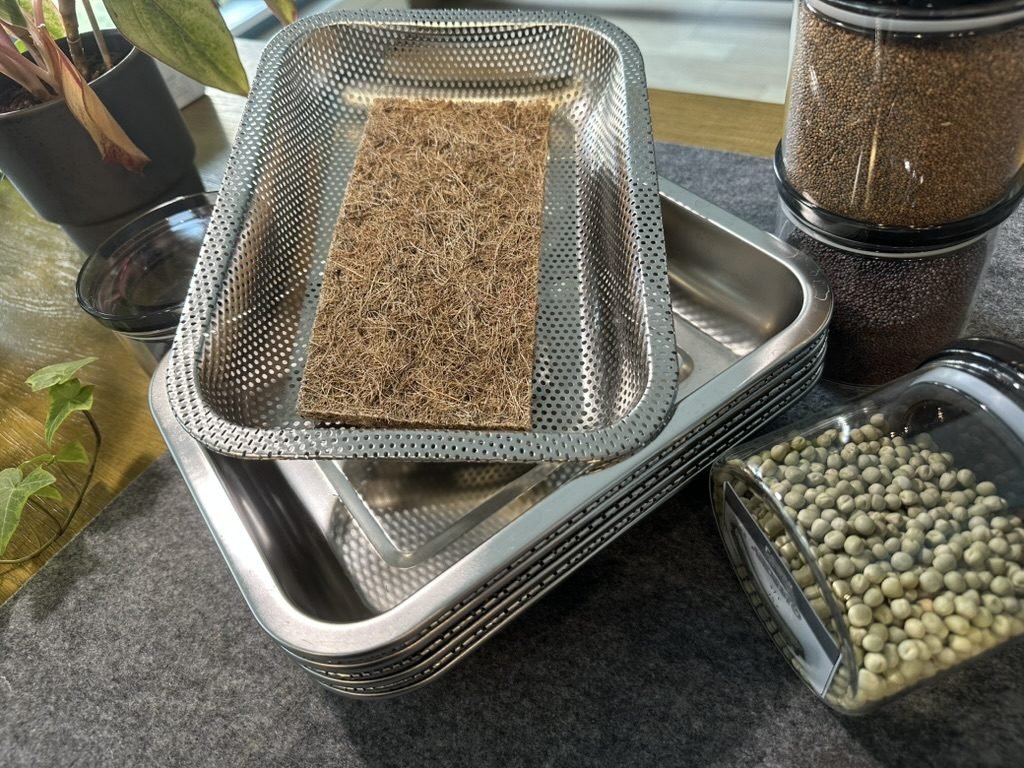
10.4 × 7.67-inch stainless steel trays with perforated inserts and fine silicone mesh.
The system pairs a perforated stainless growing tray with a solid water tray below. Fine silicone mesh is included for seeds that are too small to sit directly on the metal perforations.
- The tray size is practical for a kitchen counter or windowsill.
- The lower tray makes bottom watering simple once roots reach the reservoir.
- The stainless steel feels substantial and handles repeated washing well.
- Cleanup is straightforward once I remove the root mat.
- The non-standard tray size means I cut coir or flax mats to fit.
- Tiny seeds are easier for me with an added growing mat than with the silicone mesh alone.
- Using one tray as a germination press temporarily reduces the number of trays available for growing.
- Home growers who want a compact, reusable setup.
- Peas, sunflower, radish, and other microgreens that do well on the perforated tray.
- Anyone building a large setup on the lowest possible budget.
- Growers who want standard 10 × 20-inch trays and ready-made accessories.
How I Use These Trays for Larger Seeds
-
Rinse and soak the seeds
I rinse the seeds with warm water, then soak them for about 8–10 hours. I often add about a teaspoon of hydrogen peroxide to the soaking water as an extra mold-control step.
-
Spread them over the perforated tray
After soaking, I drain the seeds and spread them in an even layer. For peas, sunflower, and other large seeds, I use the stainless filter tray directly without the silicone mesh.
-
Add a little water below
I put some water in the lower tray. At this stage the roots have not reached it yet; the water mainly helps keep the environment humid while germination gets started.
-
Press the seeds
I place another tray directly on top and add roughly 1 kg / 2.2 lb of weight. The pressure keeps the seeds in close contact with the tray and encourages a more even start.
-
Mist once a day
I lift the upper tray carefully, mist the seeds, and put the press back. A few seeds may cling to the upper tray during the first days, so I handle it gently rather than pulling everything apart.
-
Remove the press when the shoots lift it
After roughly 3–4 days, roots are usually reaching down and the shoots begin pushing the upper tray upward. That is my signal to remove the weight and move the tray into light.
-
Let the roots drink from below
From here I mostly watch the water level. Peas and sunflower can drink surprisingly quickly, so I top up the lower tray whenever the roots need it.
-
Harvest when the growth looks right
After another 4–5 days in good light, my larger-seed microgreens are usually ready to cut. I harvest only what I need or cut the full tray at once.
These timings are what I usually see at home, not a stopwatch. Temperature, seed variety, and light can move the schedule a little.
Why the Water-Reservoir Setup Works
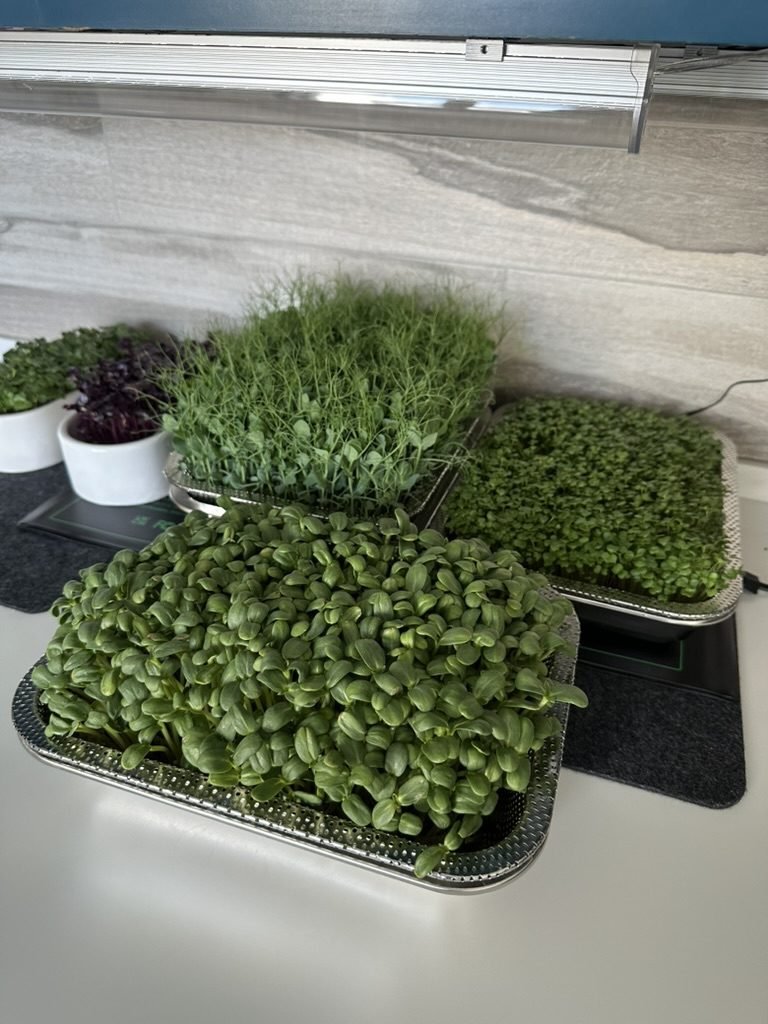
The useful part of this design is the gap between the perforated growing tray and the solid water tray below it. Once the roots grow through the holes, they can reach the water directly while the seeds and stems stay above it.
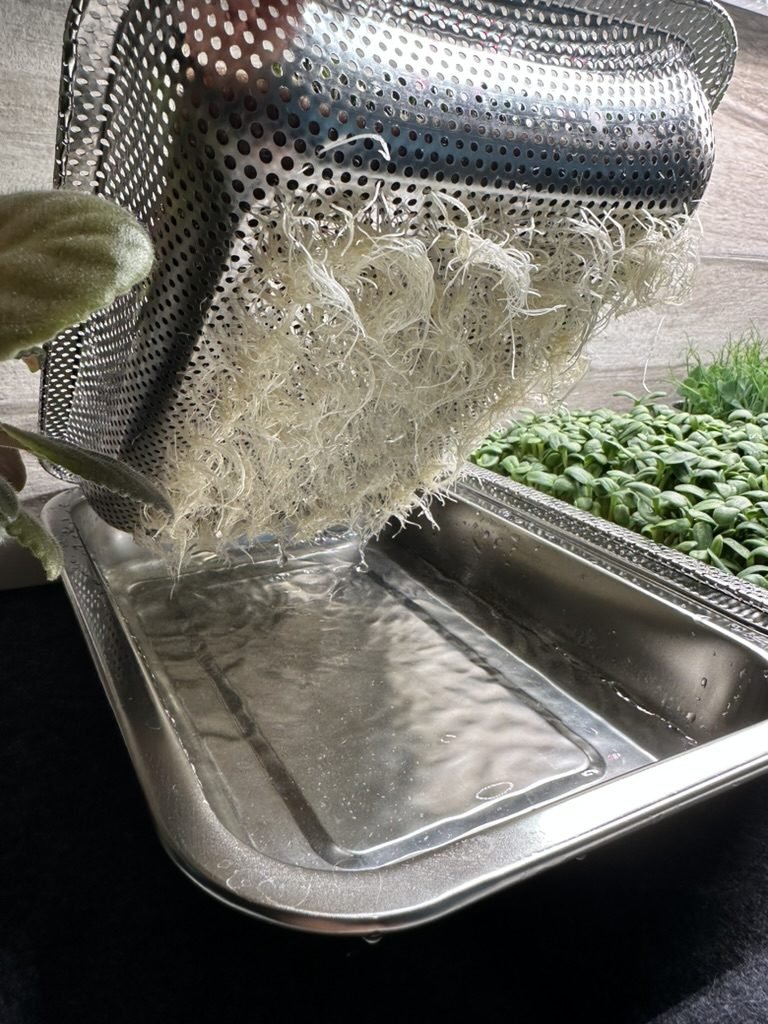
That changes the job from frequent surface watering to something much simpler: I mainly keep an eye on the reservoir. The plants take what they need from below, and by the end of a batch the underside of the tray is usually covered with a dense white root mat.
I also like that the seed layer itself stays relatively dry once the roots are established. In my experience, that makes the tray less fussy and gives me fewer constantly wet stems and seed hulls to worry about.
Once the roots are hanging through the tray, I keep enough water below for them to reach it without flooding the seed layer above.
This is the same basic nested-tray idea I use elsewhere: a perforated tray above a solid reservoir. If you’re deciding between tray styles, see microgreens trays with or without holes. For the watering side, I also have a separate guide to bottom watering microgreens without flooding the tray.
Small Seeds: I Prefer a Growing Mat
I also grow broccoli, arugula, cabbage, kohlrabi, and other small seeds in these trays. The included fine silicone mesh keeps them from dropping through the perforations, so it does the basic job.
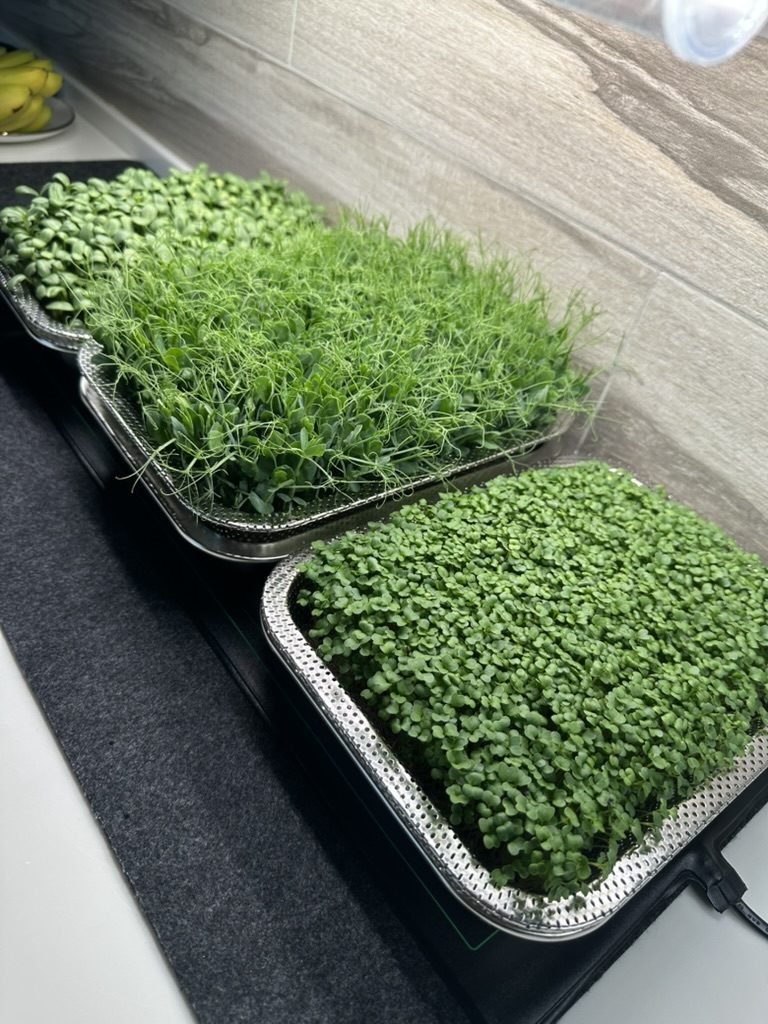
For small seeds, though, I usually put a coconut coir mat on the tray instead. Flax works too.
I get two practical benefits from a mat:
- It holds moisture close to the seeds. I can wet the mat thoroughly at the start and usually do much less misting during germination.
- It gives fine roots something to grab. The seedlings tend to establish more evenly and grow upward instead of shifting around on the smooth mesh.

A coir roll is handy here because I can cut each piece to the exact tray size. It holds moisture around tiny seeds and gives delicate roots something to anchor into.
The only annoyance is fit. These trays are not a standard grow-mat size, so I cut the material myself. It takes a minute, and after the first piece I can use it as a template for the rest.
For me, the mesh is useful when I want a completely soil-free setup. A growing mat simply makes tiny seeds easier and more consistent.
If you want to compare the two mat materials in more detail, I’ve also broken down coco coir vs. hemp mats for microgreens.
How Many Seeds I Use per Tray
These amounts work well for me in one 10.4 × 7.67-inch tray:
Amounts I Use per Tray
I use a small digital scale because a few grams can make a noticeable difference with tiny seeds. Too sparse and I waste tray space; too dense and airflow gets worse.
I treat these as my starting numbers, not universal rules. Seed size varies by variety and supplier, so I adjust a little if a batch looks crowded or thin.
Using a Tray as a Germination Press
During germination, I use another stainless tray as the press. It sits flat, spreads the pressure evenly, and is sturdier than improvising with a plate or cutting board.
The only catch is timing. A tray being used as a press is temporarily out of growing duty. Once the first batch starts lifting the press, I move that tray to the next batch. If I want several trays germinating at the same time, I need an extra tray or a separate flat lid.
I can also stack more than one tray during germination, which is handy when I’m starting batches close together.
A simple flat stainless lid would make this setup better. I don’t need hinges or ventilation holes — just something that sits directly on the seeds and can take a little weight.
Harvesting and Cleaning
Harvesting
I cut the microgreens close to the base with scissors. If I’m not using them immediately, I put them in an airtight container in the refrigerator and normally finish them within 3–5 days.
Cleaning the tray
The roots usually form a surprisingly dense mat under the perforated tray. I cut or scrape most of it away first, remove any stubborn plant material, then wash the stainless steel with a sponge and regular dish soap.
The seller lists the trays as dishwasher safe, but I usually hand-wash them. Once the root mat is off, there really isn’t much left to clean.
Growing in a Cool Room
My home runs fairly cool in winter, so I sometimes put the trays on a seedling heat mat with a thermostat during germination. I don’t use heat all the time; it is just a useful option when the room itself is slowing things down.
The stainless steel trays respond quickly to bottom heat, which is convenient, but it also gives me a reason to use a thermostat rather than leave a heat mat running blindly. Depending on the setup, I place the probe in the water reservoir or against the growing mat so I’m measuring close to where the seeds and roots actually are.
Once the seedlings are growing well, I usually don’t need to keep adding heat just for the sake of it.
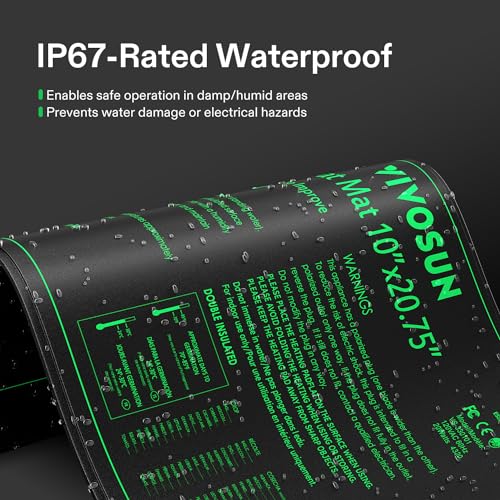
When my kitchen is cold, I use a thermostatically controlled heat mat like this under the metal trays. The thermostat is the important part: I want gentle, measured warmth rather than constant uncontrolled heat.
- Mat size
- 10 × 20.75 in
- Power
- 20 W
- Control
- Digital thermostat included
A heat mat is optional equipment for me, not part of the basic tray setup. If the room is already comfortably warm and germination is moving well, I leave it out.
Stainless Steel vs Plastic Trays
I own inexpensive plastic microgreens trays too, and they can grow perfectly good microgreens. So I don’t think stainless steel is somehow required.
What I get from stainless is mostly durability and confidence in the material. These trays feel rigid, they have handled constant water without rusting in my use, and I can scrub them without worrying about flexing or cracking the tray.
Plastic still wins on price and weight. If I needed a large number of trays cheaply, I’d understand choosing plastic. For the smaller setup I use at home, though, I’m happy to pay more for stainless steel because I expect to keep using the same trays for years.
There is also one small winter advantage: metal transfers heat quickly when I use a thermostatically controlled seedling mat. That is useful, but it is a bonus rather than a reason to buy the trays.

This is the kind of plastic setup I mean: an inner growing tray over a water reservoir, plus a humidity lid. It can do the same basic job for much less money.
This isn’t a stainless-steel-only hobby. Plastic can do the same basic job for less money; I simply prefer the feel, rigidity, and long-term reusability of stainless for my everyday trays.
How I Tested These Trays
This review comes from repeated batches at home, not a one-week unboxing. I’ve used the trays with different seed sizes, different growing surfaces, and through full grow-and-clean cycles.
I grew peas, sunflower, and radish directly on the perforated stainless tray and used the lower tray as a water reservoir once the roots reached it.
I tried the included silicone mesh with broccoli, arugula, cabbage, and similar seeds, then compared that setup with coconut coir and flax mats.
I used another tray as a flat press with roughly 1 kg / 2.2 lb of weight and rotated trays between batches as germination progressed.
I paid attention to watering, winter use with gentle bottom heat, harvesting, root-mat removal, hand washing, and whether constant moisture caused any rust.
My scores reflect how the trays perform in my own kitchen setup. Seed variety, room temperature, light, and growing medium can change the details.
My answer is yes if I want a permanent, reusable tray system rather than the cheapest way to grow microgreens. The stainless steel construction is why I’m comfortable paying more; the reservoir design is what makes the trays pleasant to use day to day.
If I were buying again, I’d choose this style of tray again.
FAQ
Can I grow microgreens in these trays without soil?
Yes. I grow larger seeds such as peas, sunflower, and radish directly on the perforated stainless tray. For tiny seeds, I usually add a coconut coir or flax mat because it holds moisture and gives the roots something to anchor into.
Do I need a grow light?
Not necessarily. A bright windowsill can work well. I use an LED grow light when natural light is weak or I want more predictable growth.
Can all the trays be used at the same time?
Yes, but there is one practical catch: during germination I often use one tray as a press. If I want every tray growing at once, I need a separate flat lid or another tray for pressing.
Do the stainless steel trays rust?
I haven’t had any rust problems despite repeated contact with water. I wash them after each batch and let them dry before storing them.
Are the trays dishwasher safe?
The seller lists them as dishwasher safe. I usually hand-wash mine because once the root mat is removed, a sponge and dish soap are enough.
