
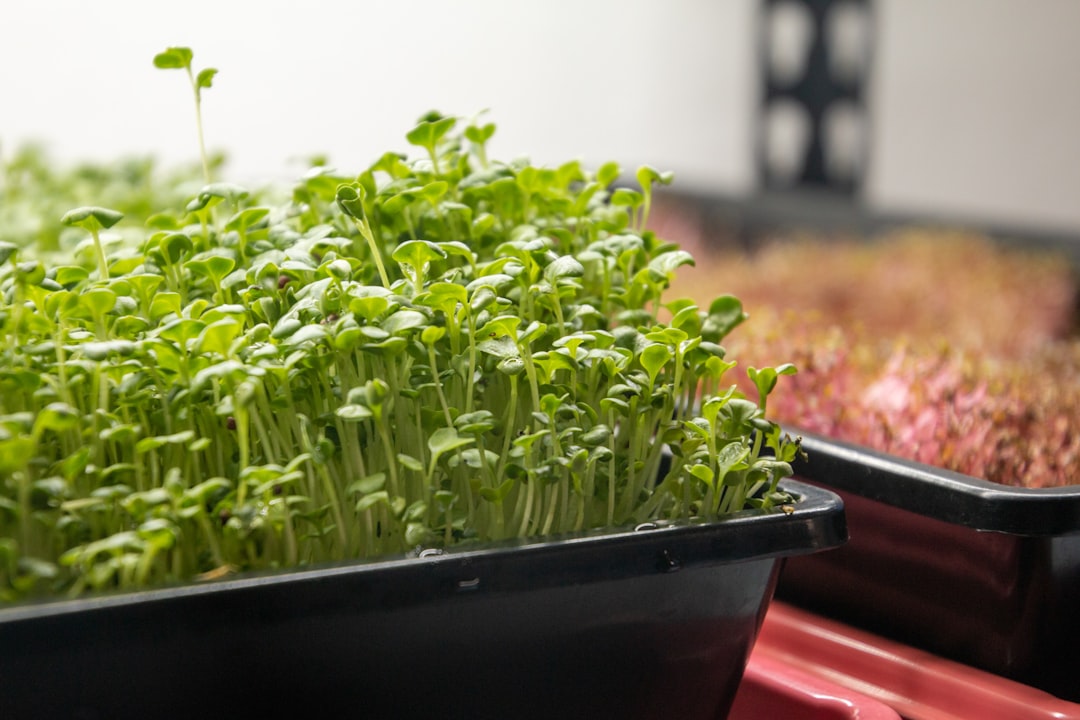
A soggy tray usually means the method is off by a little, not that the crop is doomed.
Ever pour water into the bottom tray, come back 20 minutes later, and find the soil glossy and heavy? I’ve done that more than once, and it usually wasn’t because microgreens are “fussy.” It was a small mismatch: too much water at once, a tray left sitting too long, or a growing medium that was already holding more moisture than it looked like.
In my experience, bottom watering turns swampy for a few very fixable reasons. Tray depth, hole size, soak time, and starting moisture all change how fast water climbs. If one of those is slightly off, a dry tray can flip to oversaturated fast. That’s frustrating, but it’s also useful: flooding is often a setup clue, not a mysterious failure.
If you want to see a compact version of this approach, the stainless tray system I use at home relies on the same bottom-watering idea: roots grow through the upper tray into the reservoir below.
Tray stack
-
Empty base
-
Nest tray
-
Add 1/4 cup
-
Lift, repeat
Building a bottom-watering stack
This shows the stack I use and the few watering supplies I keep handy so I can add a little, lift, and stop.
When the tray isn’t wicking well
Sometimes the surface looks thirsty, but the real problem is poor wicking, not too little water. I’ve had trays stay dry on top even after a careful pour because the moisture just wasn’t moving up into the media.
Before I add more water, I check these:
- Tray holes: If they’re blocked, too small, or barely touching the water, uptake slows down.
- Level setup: A slight tilt can leave one side drinking and the other side dry.
- Tray shape: Warped trays can create gaps, so the media never makes even contact.
- Media contact: Mats and soil both wick better when they sit flat against the tray.
- Density: Soil packed too firmly, or a mat pressed down hard, can pull water up more slowly.
If one of these is off, extra water can look like the answer while actually raising the flood risk.
If only a few patches are struggling, I usually suspect contact or leveling before I assume the whole tray needs a refill.
Add water in small rounds
What helped me most was treating bottom watering like a few short rounds, not one big pour. I start with 1/4 to 1/2 cup in a standard 10×20 setup, wait a minute or two, then check the lower tray before adding more.
That range is only a trial. A shallow sowing with light density may wick enough on the low end, while deeper media or a thick pea or sunflower tray can need more before the surface feels evenly damp.
I watch a few simple cues:
- Tray size: smaller trays usually need less.
- Media depth: deeper mats hold more water.
- Crop density: crowded trays drink faster.
- Starting moisture: already-damp medium changes the math.
If the tray still looks dry, I add another small splash instead of making the next pour much bigger. That slow rhythm has saved me more spills than any exact number.
For a typical nested 10×20 tray, I often begin at 1/4 cup. If it disappears quickly, I add a little more and recheck before going past 1/2 cup.
I give the first pour a minute to do its job
-
Pause longer than feels natural
After a small pour, I wait about 1–3 minutes before deciding anything. Water often keeps moving upward during that little pause, so adding more too fast is how I end up with a swampy bottom tray.
-
Watch the surface color, not just the water below
From above, I look for the medium to darken a bit and lose that pale, dusty look. I’m not waiting for the whole top to look wet—just for the driest-looking areas to soften in color.
-
Check whether the dry spots are shrinking
I compare the corners, edges, and center. If the dry patches look smaller or less crusty than they did a minute ago, the tray is usually still wicking and I can hold off.
-
Lift a corner for a quick weight check
I also trust the feel of the tray. Even a slight increase in weight tells me moisture is moving in, which matters more than my impulse to top it off right away.
-
Only add more if the signs stay stubborn
If the surface still looks very dry after the pause and the tray still feels light, I add another small round. If it has darkened some and feels less dry overall, I stop there.
The top layer can stay a little lighter than expected and still be adequately watered below.
What “enough” looks like
A tray can be watered enough even when the top still looks fairly matte.
I watch for subtler signs: the tray feels a bit heavier, the medium darkens in patches, and the dry-looking areas stop shrinking. The goal is moisture at the roots, not a shiny top.
If water is still pooled after a short wick-up window, it’s usually extra.
I give the tray a minute or two, then check again. If there’s still a visible puddle underneath, I drain it off rather than letting the tray sit in it.
Overshooting often creates sogginess, not useful reserve.
Once the medium seems evenly damp and the tray has stopped pulling water quickly, I leave it alone. A tray that was already moist may need surprisingly little on that round.
If I accidentally flood the tray
Stay calm and correct the setup
If I notice standing water under the grow tray, I usually pour off the extra right away and let the tray drain for a minute. A brief overfill is often recoverable, especially if the medium still has some structure and the stems are upright.
If the top surface looks glossy or swampy, I stop watering and focus on airflow. A small fan nearby, a little more spacing, or simply leaving the tray alone for a bit can help the excess moisture move out instead of lingering.
If only one side or corner keeps flooding, I check the boring stuff first:
- tray sitting on a slight tilt
- warped bottom tray
- uneven contact between mat and tray
- one area of medium packed more tightly
When the greens look stressed after a flood, I try not to overcorrect. I do less, not more: no extra top watering, no pressing down on the mat, and no immediate restart. Then I watch for a few hours for improved posture, less shine on the surface, and any stale smell that suggests the tray needs more air.
Adding more water “just in case” usually makes the read harder. If I am unsure, I wait, recheck tray weight, and look for surface drying before doing anything else.
My simple watering reset
- Small rounds I bottom water in small rounds, pause briefly, then stop once the tray feels evenly damp instead of chasing a glossy surface.
- Drain extras After each soak, I dump any water still sitting in the lower tray so roots are not parked in leftovers.
- Reset each time On the next check, I start fresh rather than guessing from old water. That keeps each revisit easier to read.
- Quick cleanup Between wetter batches, a quick rinse and wipe helps the stack wick more predictably and smell fresher.
- Dump standing water after the soak, not hours later.
- Clean lightly between wet cycles so the next watering behaves the same way.
What works for me is a calm loop: add a little, wait, check the feel, drain leftovers, and walk away. When I come back later, I read the tray again from scratch instead of topping up blindly.
That rhythm keeps bottom watering from turning into flooding, and the quick cleanup between wetter cycles helps the whole setup stay predictable.

I tried your simple reset loop over a few cycles and it made my watering way more consistent. Light soak, drain leftovers, reassess later sounds almost too basic, but apparently basic is what I needed.
Also cleaning trays between wetter cycles helped more than I expected. I think residue was messing with contact and wicking on one of my old bent trays.
Good post. Practical, not preachy.
Glad it helped. That repeatable reset is simple on purpose because it makes tray behavior easier to read from one watering to the next.
And yes, residue plus a slightly bent tray can absolutely interfere with contact and wicking. Small physical issues often look like mysterious watering problems.
The nested tray setup tip was solid. Being able to actually see the water level instead of guessing from the side made a huge difference.
Before this I was basically bottom watering by vibes.
The quarter-cup idea was weirdly helpful. I was definitely doing the classic “looks dry, dump more water” thing and then wondering why the tray turned into a swamp.
Tried your small-rounds method this morning and the dry patches actually kept shrinking after I stopped messing with it. Lesson learned: impatience is apparently my main gardening problem 😅
My issue turned out to be already-moist medium. I pre-moistened pretty heavily, then bottom watered like it was bone dry, and yep… flooded.
This article explained that better than most. People keep talking about watering amounts without mentioning the starting moisture, which is kinda the whole game.
I’m still struggling with the “not wicking well” part. My tray has holes, but one corner always stays lighter/drier and the opposite side gets too wet.
I checked after reading this and the tray does seem slightly warped. Didn’t even occur to me that a tiny tilt could throw things off that much.
Going to try shimming that side and see if it fixes it before I blame the seeds again.
Yes, even a small warp or tilt can create that exact uneven pattern. If one corner keeps drying while the opposite stays wetter, I’d check tray contact first and make sure the insert is sitting flat in the bottom tray.
Shimming can help as a quick test. If the pattern improves, you’ve likely found the issue.
Step with waiting a minute after the first pour… that’s the one I skip every time lol. Then I overwater because I assume nothing is happening.
Read this, forced myself to wait, and sure enough the color changed upward more than I thought it would. Annoying that patience keeps being the answer 😂
This worked for me with sunflower, but peas still make me second guess everything. The top never looks as wet as I expect, so I keep hovering over the tray like a nervous parent.
Your point that “enough” doesn’t have to look soaked was honestly the part I needed. I drained the lingering puddle instead of letting it sit, and the tray was fine the next day.
Not gonna lie, I’m a little skeptical of universal cup measurements for this. A quarter cup in one tray setup is not the same as in another, especially with different media density.
That said, I do appreciate that you framed 1/4–1/2 cup as a trial range instead of a rule. Too many guides act like every tray on earth behaves identically.