
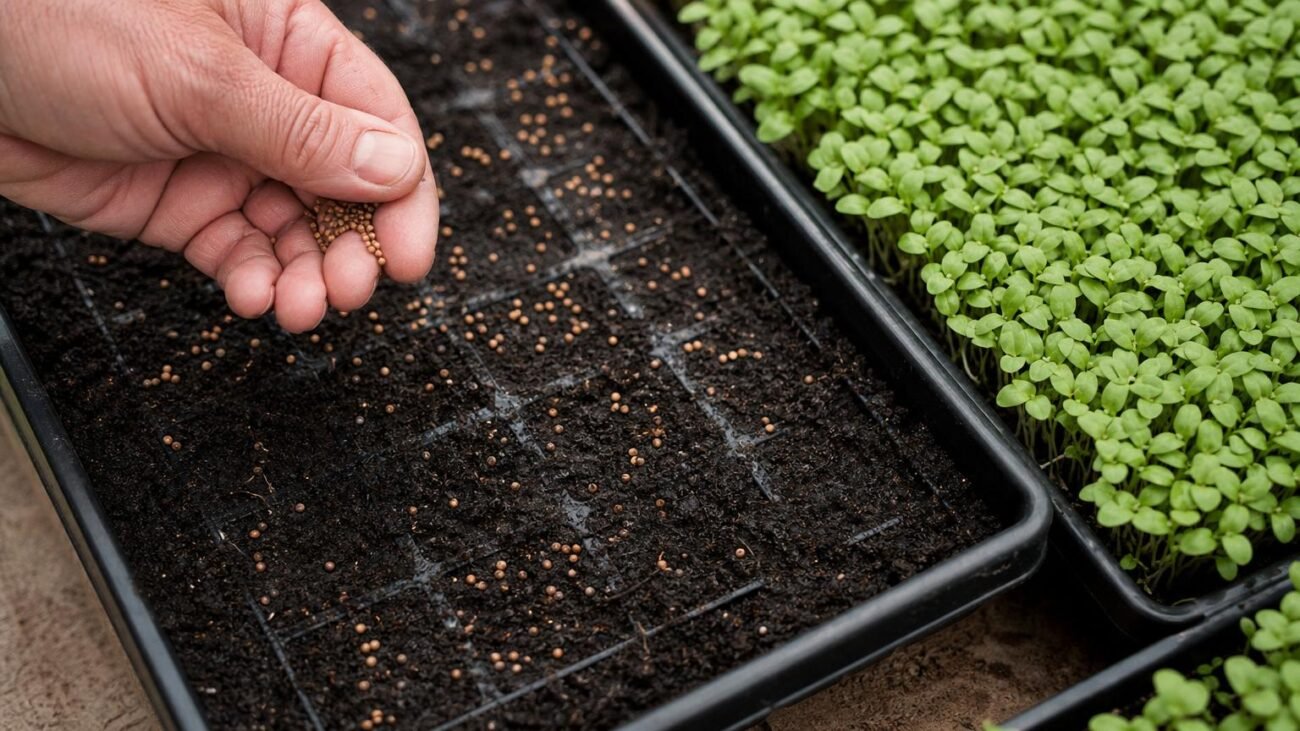
A tray can look underfilled and overcrowded almost at the same time.
Have you ever scattered seed, stepped back, and thought, Did I just make a patchy tray or a soggy one? I still get that little wobble of doubt. With microgreens, both mistakes start the same way: the tray looks fine at first, then gaps stay bare or the whole surface turns into a damp, tangled mat.
What I try to picture now is a tray that closes up quickly without feeling stuffed. Good density is really a balancing act: enough seed for a full, even canopy, but enough room for air to move and stems to lift cleanly. Once I stopped chasing “more” and started watching for that calmer middle, sowing felt much easier.
What correct density looks like
Before I cover the tray, I aim for a single, even layer of seed across the surface. The seeds can sit very close, but I don’t want them stacked on top of each other. If I can spot little hills, doubled-up lines, or empty corners, I know I need a quick reshuffle.
A good tray usually looks like this:
- One seed deep almost everywhere
- Tiny gaps here and there, not wide bare patches
- No heavy piles along the edges or in the middle
- The surface looks evenly speckled, not lumpy
After germination, the same tray should rise into a fairly uniform canopy. I look for sprouts lifting at about the same rate, with only small variations.
Signs the sowing was too dense:
- Sprouts pushing up in thick mats
- Seed hulls trapped in crowded clusters
- Pale, stretched stems in one area
Signs it was too sparse:
- Noticeable bald spots
- Uneven height with isolated bunches
Why one seed rate rarely fits every tray
A seed rate only makes sense in context. I stopped trusting blanket “grams per tray” advice once I noticed that two trays sold as 10×20 did not always give me the same planting space. The inside rim, rounded corners, and whether I sow right to the edge all change the usable surface area.
- Smaller seed usually spreads more evenly, so I can sow it a bit tighter.
- Larger seed needs more room because each seed takes up more surface and often lifts a thicker stem.
- Crop habit matters too: broccoli and kale can sit closer than peas, sunflowers, or beet clusters, which bulk up fast.
I treat published rates as a starting point, not a rule. If a lot has very strong germination, I may back off slightly because more seeds are likely to sprout. If the seed is older or sprouts less evenly, a slightly heavier sow can sometimes reduce obvious bare patches.
Freshness is a quieter factor, but I do notice it. Newly opened seed often comes up more uniformly than seed that has been sitting around for months.
That is why one universal sowing number rarely holds up. I get better results when I judge the real tray space, the seed itself, and how that crop behaves once it starts growing.
My simple way to set a starting density
-
Measure only the part that actually grows seed
I measure the flat inner surface of the tray, not the outer rim. Rounded corners, ridges, and lips can shave off more space than I expect, so I use the usable length and width as my reference.
-
Choose how I want to repeat it
If I have a kitchen scale, I use grams for easy do-overs. If not, I use visual coverage and aim for the same surface look each time.
-
If I use a scale, I start light
I weigh a modest amount, spread it, and check whether the seeds sit in a mostly single layer. Tiny gaps are fine; piles and heavy overlap usually mean I went too far.
-
If I go by eye, I check the tray from a few angles
I scatter seed evenly, then rotate the tray and look for bare patches or stacked spots. I want the surface to look evenly dotted, especially along edges and corners.
-
I treat the first tray as a baseline, not a rule
After germination, I note whether the tray looked sparse, balanced, or crowded and write down the grams or visual description I used. That gives me a calm starting point for the next round instead of chasing a perfect number on day one.
A repeatable method usually teaches me more than guessing fresh every tray. Even a rough note like “10×20, medium broccoli, 18 g, slightly crowded” is useful, because I can adjust from something real instead of starting over.
Starting ranges I reach for
These are starting points, not strict rules; seed lot, tray area, and germination can shift them a bit.
Even coverage, not piles
-
Scatter one-third lightly
-
Rotate tray a quarter-turn
-
Repeat in 3 passes
-
Break clumps before misting or stacking
Comparing seed densities
UrbanAgMike shows side-by-side rates, which helps me sanity-check a tray before I finish sowing.
Read the tray in the first few days
In the first 2–4 days, I try to judge the tray by the whole surface, not one corner. Density mistakes show up as patterns.
- Too sparse: I see bare patches, little islands of seedlings, and lots of exposed medium. Even after germination starts, the tray looks broken up instead of knitting together.
- About right: sprouts rise in a fairly even sheet, with small gaps but no big holes. The surface starts to look like one mat without feeling jammed.
- Too crowded: seed husks stack on each other, seedlings push sideways, and the top stays matted and slick-looking.
A tray can look “off” for reasons besides seed count. If stems are extra pale and stretched but spacing looks even, I usually check whether the tray needed a shorter or longer blackout. If seeds are clumping, sticking, or collapsing in wet spots, that often points more to early misting or trapped moisture than density alone.
Lift the tray and look across the surface at a low angle. Uneven height often hints at moisture or blackout issues; uneven spacing usually points to sowing density.
When crowding turns soggy
Once I push density too far, the tray stops drying evenly. Tiny damp pockets form where stems overlap, airflow drops, and the surface can stay humid longer than it looks.
That is why crowding and moisture often travel together. Heavy watering, a sealed cover, or weak fan movement can make an already tight sowing much touchier; if you’re trying to reduce mold risk after dense sowing, density is part of the picture.
A dense tray can look lush and still hide wet spots. When watering or ventilation is off, those spots tend to linger.
Keep a Tiny Feedback Loop
At this point, I stop chasing a perfect number and start keeping a tiny record: variety, tray size, seed amount, and what the tray looked like on days 2, 3, and 4. Those few notes tell me more than memory ever does.
On the next sowing, I only move a little—slightly up for gaps, slightly down for matting or lingering wetness. Small nudges are easier to read than big jumps, and after a round or two, the tray usually settles into a dependable rhythm.

I still feel like the starting gram ranges are the part beginners will obsess over too much.
I get your point that tray area and seed freshness matter, but that’s also exactly why published ranges can send people in circles. My 1020s are not all truly the same inside measurement, and one batch of peas from this spring behaved totally different from the older bag I was finishing.
Not really disagreeing with the article, just saying the visual cue section was stronger for me than the numbers.
That’s fair, and honestly it’s why I try to frame the ranges as a starting point instead of a rule.
If someone treats the grams as “close enough to test” and then checks the tray visually over the first few days, they usually dial in faster. The usable tray area and seed quality can move the right answer more than people expect.
100% this. I wasted so much time trying to copy somebody else’s exact pea rate when my trays were shallower and my seed lot was different.
Once I started watching for wet pockets and tangled stems instead of chasing a magic number, things got easier.
Step-wise this clicked for me until the “even multi-pass scattering” part. That’s the bit I still mess up.
I always think I’m being even, then after misting I notice little heavy patches where seeds glued together. Do you separate clumps with dry fingers before the mist, or do you just keep rotating the tray and scatter lighter each pass?
Usually both. I try to scatter lightly in several passes while rotating the tray, and if I see obvious clusters I break them up before watering.
The key is to catch clumps while everything is still dry and movable. Once mucilage or surface moisture starts locking seeds together, it’s much harder to fix without making an even bigger mess.
Question on the “stretching and clumping can come from blackout or moisture instead” part.
I assumed my sunflower tray was crowded because it leaned and matted, but maybe I blamed density too fast. Germination was decent, coverage looked close to one layer, yet after blackout it came up pale and kind of stuck together.
Could that be more about leaving weight/blackout on a bit too long? Airflow in that room is not amazing either.
Yes, that absolutely can be blackout timing and moisture, not just seed density.
If coverage was near a single layer and germination looked solid, I’d first look at how long it stayed covered, how wet the surface remained, and how quickly the tray got light and airflow after stacking/blackout. Sunflower can mat up fast when it’s a little too damp and a little too long under cover.
I’d change just one or two things next round: uncover slightly earlier, improve airflow, and keep surface moisture from lingering.
Had the same issue with sunflower. I kept reducing seed and it wasn’t really the seed rate at all.
Earlier uncovering fixed more than I expected.
The part about using the first sowing as a baseline + keeping tiny notes was weirdly the most helpful thing here. I kept trying to remember “what worked last time” and of course I was always wrong 😅
I backed off my broccoli tray just a little and the canopy came in way more even. Less tangly too.
Appreciate that you said sparse trays can be a problem too. A lot of guides only warn about crowding, but my last kale tray had so many gaps it looked like a bad haircut.
I nudged the rate up only a little on the next one and got a much better canopy. Tiny feedback loop > dramatic overcorrection, apparently.
This worked for me with radish, not gonna lie. I used to sow like I was salting fries 😂 and then wonder why the middle of the tray stayed swampy.
The note about crowded trays reacting harder to watering/ventilation was DEAD on. I cut the density a touch, bottom watered more carefully, and the tray smelled normal for once instead of… biology experiment.