
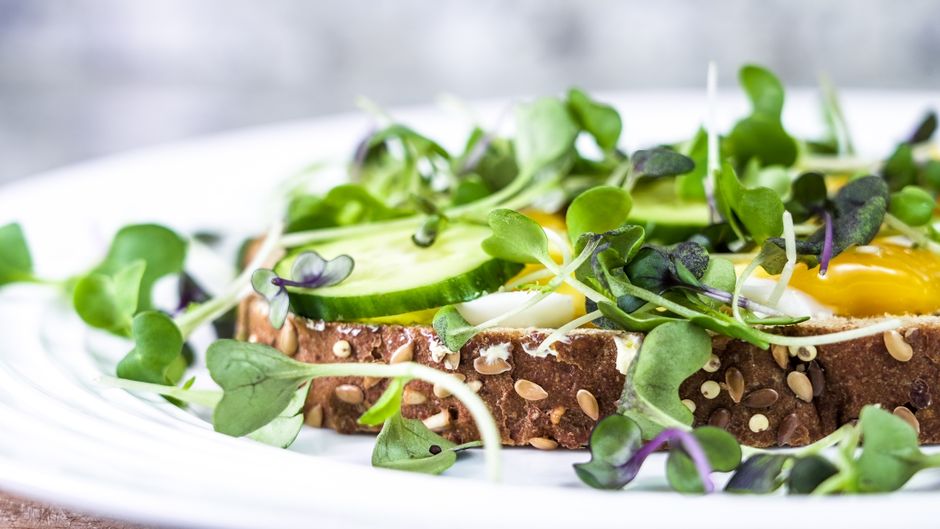
Fresh-looking can fall apart fast.
Ever bite into a sandwich that looked bright and tidy, then suddenly the filling shoots out and the bread turns damp? I’ve had that happen more often with microgreens than with lettuce, because they’re springier, lighter, and often wetter from rinsing. The good news is microgreens aren’t the problem. In my kitchen, the mess usually comes from how I layer moisture, spreads, and slick ingredients. A small build change can keep everything crisp and much easier to hold.
What actually keeps a sandwich crisp
A light handful usually stays crisper than a fluffy mound.
When I pile them high, the greens trap moisture, slide around, and push fillings outward.
Wet ingredients can work if they are separated from the bread.
Tomatoes, pickles, and spreads cause less trouble when a dry layer sits between them and the loaf.
Moisture control, structure, and portioning do most of the work.
Thin layers, a firm stack, and a sandwich that closes easily tend to stay neater in my kitchen.
I think in layers, not volume: a modest amount of greens, a barrier for wetter fillings, and no overstuffing. If the sandwich closes without squeezing, it usually stays crisp longer.
Start with dry, loose greens
I treat prep as the point where a crisp sandwich is either saved or quietly ruined.
If my microgreens look clean straight from the grower or package, I usually skip rinsing. If they came from a garden bed, have hulls, or look dusty, a quick rinse can help. The tradeoff is moisture, so I only wash when there is a clear reason.
Why dry matters more than extra volume
Wet greens slide, mat together, and dump water into the bread. Fully dry greens stay springy, so I can tuck in a small handful and get light bites instead of a slippery layer.
What helps most for me:
- Dry completely with a spinner or towels
- Fluff and separate any packed clumps with my fingers
- Trim long roots or tangled stems if they make the pile catch and pull
Loose, airy greens spread more evenly, which makes the sandwich easier to close and easier to bite without everything shooting out the sides.
If I rinse, I let the greens sit on a towel for a few extra minutes after spinning. Slightly damp can still feel dry in the bowl, but it often shows up later on the bread.
Build the sandwich so it holds together
I’ve had much better luck once I stopped treating microgreens as the thing doing all the work. The real support comes from the bread, the spread, and the first filling layer. When those are steady, the greens can stay light and crisp instead of squirting out the sides.
- Choose sturdy bread with some structure: toasted sandwich bread, a seeded roll, ciabatta, or a hearty whole-grain slice. Very soft bread can taste nice, but it compresses fast and lets slippery fillings skate around.
- Add a thin moisture barrier on both slices. A swipe of butter, cream cheese, hummus, mashed avocado, or even a cheese slice can help slow juices from soaking in.
- Keep slick condiments light and even. If I want more sauce, I usually spread it thinly all the way to the edges rather than leaving a wet blob in the center. For that, I use ideas from dressings that work with sandwich greens.
- Put grippy fillings under and over the greens: sliced turkey, firm cheese, cucumber ribbons patted dry, or tomato only in thin slices.
I also try not to stack too many soft ingredients together. One juicy layer is manageable; three soft layers usually turn into a slide.
My crisp stack
-
Bread + thin spread
-
Cheese or dry slices
-
Main filling
-
Microgreens near top
-
Top bread, gentle press
Same ingredients, calmer stack.
Keeping microgreens in place
I like this sandwich demo because the greens stay light and high in the stack, which helps limit slipping.
Make it easy to eat
I’ve found a sandwich stays neater when I build it for how I’ll eat it, not just how it looks on the board. For lunchboxes or commuting, I keep the size modest: one layer of fillings, about 1/4 to 1/2 cup of microgreens, and bread slices that match closely. Tall stacks look appealing, but they tend to drag greens out with each bite.
Cut and pack for less spill
A clean cut helps more than I expected. I use a sharp serrated knife with a light sawing motion, then wipe the blade before the second cut so it doesn’t smear fillings or tug loose greens.
For travel, a few small habits make a noticeable difference:
- Wrap the sandwich snugly in parchment or wax paper.
- Cut it in half so the stack is easier to bite through.
- Pack the halves with the cut sides facing inward or up.
- Keep very juicy add-ons, like tomato or pickles, on the side if I’m eating later.
- For quick meals, make a smaller sandwich instead of one tall one.
If I want more food, I usually pack two smaller halves rather than one oversized sandwich. They’re easier to hold, less likely to squish, and the microgreens stay tucked in better.
Sandwich combos that stay neat
Here are a few combinations I keep coming back to when I want microgreens without the spill.
- Turkey, provolone, cucumber, broccoli microgreens: I spread mayo thinly on the bread, then put cheese next to the greens. The cheese acts like a dry shield, and the cucumber works better in thin slices than thick rounds, so the stack stays flatter.
- Egg salad, radish microgreens, soft whole grain bread: This sounds risky, but it behaves well if the egg salad is a thin layer, not a scoop. I like radish microgreens here because their peppery bite lets me use less filling overall.
- Hummus, roasted peppers, sunflower shoots, feta: Hummus gives grip, but I keep it light. I pat the peppers dry first, and the feta adds little crumbles of structure that help catch the shoots instead of letting them slide.
- Ham, cheddar, apple, mustard, pea shoots: This one stays tidy because it balances firm slices with light greens. Very thin apple slices add crunch without the wetness tomato often brings.
The pattern I follow
When I improvise, I usually aim for:
- one anchor: cheese, hummus, egg salad, or avocado mashed thin
- one crisp filling: cucumber, apple, or dry roasted peppers
- one modest handful of microgreens
- one sharp flavor: mustard, pickles, feta, or a peppery green
If a sandwich starts sounding tall, wet, or slippery, I take one thing out. That alone usually makes it much easier to eat.
A formula I actually remember
If I want a sandwich that stays crisp, I remember: dry greens, thin spread, firm barrier, light pile, gentle press. That formula works with regular sliced bread and whatever microgreens I already have—radish, broccoli, sunflower, or a mix—because the method does most of the work.
For a first easy try, I’d start with toast, mayo or hummus, sliced turkey or cheese, cucumber, then a small tuft of greens. It follows the same logic as easy microgreens recipe ideas: keep the stack balanced, and the sandwich behaves.

I liked the anchor-crisp-green-sharp pattern because it’s simple enough to remember without rereading the whole post.
Tried it with sourdough, turkey, a few cucumber slices, broccoli microgreens, and a sharp mustard spread. Stayed neat and still had crunch by the time I got to work.
The modest portions advice is so annoyingly true hahaha. Every time I try to make a “big satisfying sandwich,” I basically build a salad collapse simulator.
Smaller sandwich, cleaner cut, wrapped tight = actually edible in the car.
The “dry, loose greens” part was the game changer for me. I used to rinse the microgreens and basically toss them on while they were still a little damp, then blame the tomatoes lol.
Today I actually dried them fully and kept the layer light, and the sandwich stayed crisp through lunch. Tiny step, big difference.
Not gonna lie, I’m still skeptical about “rinse only when needed.” I buy clamshell microgreens and always feel like they need at least a quick wash.
Do you just trust the package and use them as-is? The crispness tip makes sense, I’m just hung up on that part.
Totally fair question. I don’t mean never rinse under any circumstance—just avoid automatic rinsing right before assembly if they already look clean and are labeled ready to eat.
If you do rinse, drying thoroughly matters more than anything else. A salad spinner plus a rest on towels usually gets them back to a much better sandwich state.
I’m with you on this. I still rinse mine, but I do it way earlier now and leave them in the fridge on paper towel for a while. Much less soggy.
I tried one of the neat combo ideas with roast chicken and radish microgreens. Flavor was great, but I think I overdid the greens because half of them tried to escape out the back on bite one.
So… user error, probably. Still better than the usual wet lettuce situation though.
I’m weirdly relieved to hear it’s not automatically the fault of juicy fillings. I always thought cucumber + microgreens was just doomed.
Using a thin cheese layer as a barrier worked way better than I expected.