
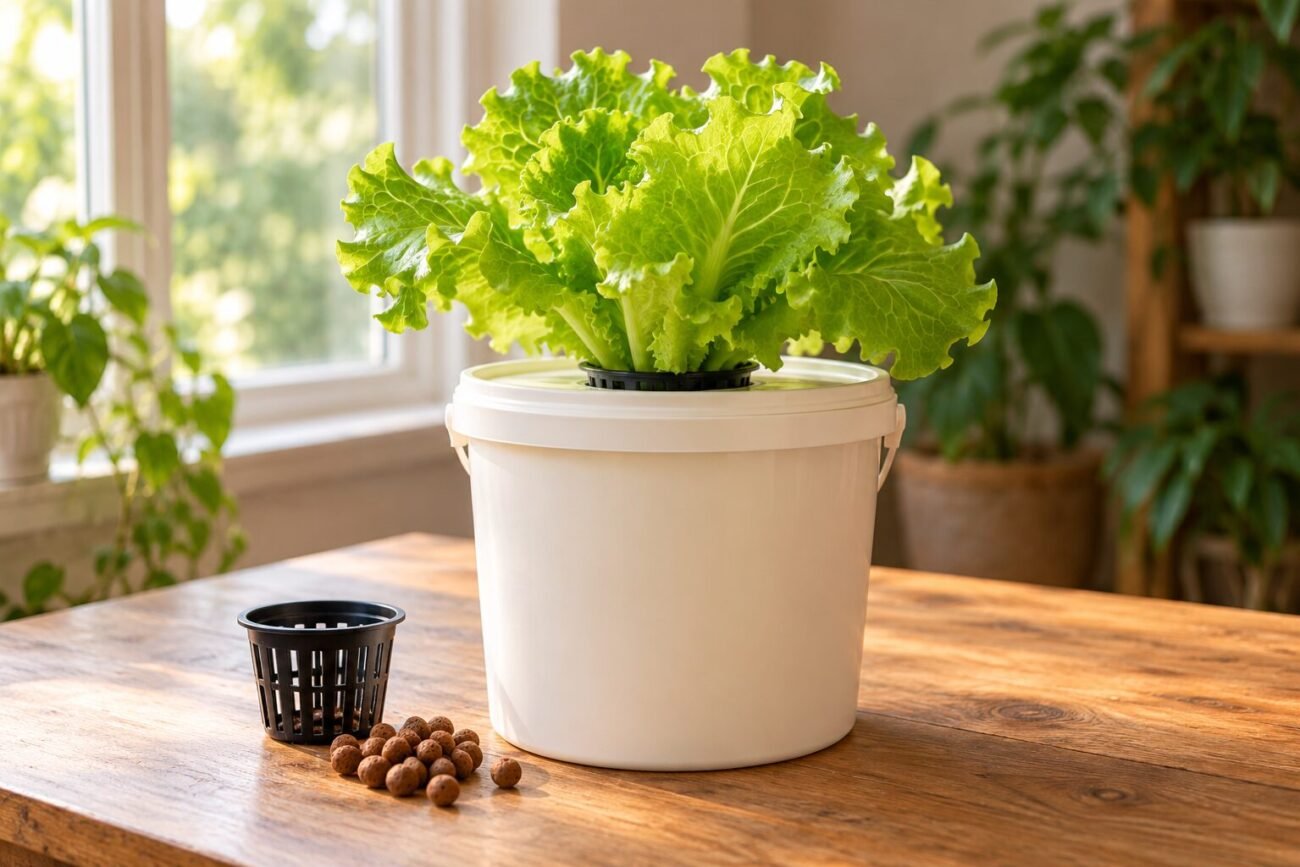
A quiet hydroponic harvest depends on the water you leave out.
A lettuce seedling can look healthy in a nutrient-filled jar on Monday and wilt by Friday if its roots stay submerged. I use the Kratky method to grow greens without a pump, outlet, or equipment noise, but the waterline matters more than the jar. At first, the solution reaches the bottom of the net cup so young roots can find it. As the plant drinks, I let the level fall. Roots in the humid space above the solution take in oxygen; roots below it take up water and nutrients. Topping the container back to the brim can drown those air-adapted roots. Give the plant room to create that gap, and the falling water level does much of the work.
Choose a crop and size the reservoir
I start with lettuce or basil because both grow quickly without the water demands of a fruiting plant. For lettuce, I allow roughly 2–4 liters of nutrient solution per plant. That gives a small plant room to grow without forcing me to top up its container constantly. Basil also works well, though I give a plant more space if I plan to keep harvesting it for months.
The reservoir does two jobs over the plant’s life. At first, I set the solution high enough to wet the bottom of the net cup or reach the seedling’s roots—not its stem. As the seedling drinks, the level falls. Some roots remain submerged to take up water and nutrients, while roots above the solution occupy the newly formed air gap and access oxygen. That is why I don’t plan to keep the container full.
A large, thirsty crop such as a mature tomato can drain a small reservoir before I expect it and needs a steadier supply of water, nutrients, and oxygen. For that kind of plant, I’d build an aerated DWC bucket instead.
Gather and prepare your materials
I gather everything before cutting the lid:
- A clean, food-safe, opaque container with a fitted lid
- A net cup and rinsed inert medium, such as clay pebbles
- A healthy seedling with roots reaching below the cup
- Complete hydroponic nutrients and water
- A marker and a sharp utility knife or hole saw
A reused food container works well. If I’m weighing the cost of a kit against a DIY setup, I check my cupboards first. I choose one that held food, not chemicals; a recycling number alone doesn’t establish that it’s food-safe. I wash the container, lid, and net cup with dish soap, then rinse them thoroughly.
Keep light out of the reservoir. Light reaching the nutrient solution encourages algae, which competes for nutrients and makes the container harder to clean. If my container is translucent, I cover its sides and lid with an opaque sleeve or tape, leaving a way to check the water level.
I trace the net cup’s body onto the lid and cut an opening smaller than its top rim so the rim rests securely on the lid. I set the lid on a stable surface, keep my free hand clear of the blade, and smooth any sharp edges before testing the fit.
Mix the nutrient solution
Plain water may keep a seedling alive briefly, but it cannot supply everything a mature lettuce plant needs. I use a complete hydroponic nutrient at the label’s leafy-greens rate, rather than a soil fertilizer or an extra-strong dose. For anyone setting up hydroponics at home, this is the essential shift: the solution must provide the crop’s entire diet.
I measure the water first, then add each nutrient concentrate one at a time, stirring thoroughly between additions. Never mix undiluted A and B concentrates together. Calcium can react with phosphates or sulfates to form particles that roots cannot readily use. If I use powders, I dissolve each component fully in the water before adding the next.
Once everything is mixed, I test the solution and aim for a pH of 5.5–6.5. Drops, strips, or a calibrated meter will work; if adjustment is needed, I add pH up or down a little at a time, stir, and retest. An EC meter can help diagnose problems later, but it is optional for this build. Measuring the water and nutrients carefully according to the label is a sound starting point.
Plant the transplant
I gently rinse the roots and seat the transplant in the net cup, keeping its crown above damp medium. I set the solution at the cup bottom or short roots, then mark the starting waterline.
A dollar-store Kratky setup
Mr and Mrs Explorer shows an inexpensive Kratky system setup.
Give the leaves steady light
I use a full-spectrum LED grow light when I want predictable growth from lettuce or herbs. I start with 14–16 hours a day on a timer and follow the fixture maker’s hanging-distance guidance. Pale, stretched growth can mean too little light; bleached or curled leaves may mean the light is too close. A bright window also works, though short winter days or nearby buildings can slow growth.
Light the leaves, not the reservoir. Sun on the foliage helps the plant; sun striking the container can warm the nutrient solution, which holds less dissolved oxygen as it heats up. I keep the opaque container out of direct sun or shade its sides while leaving the leaves exposed. With an LED, I leave space around the fixture for heat to escape.
I keep the lid seated and the net cup upright rather than opening or shifting the plant to chase sunlight. On a sturdy apartment shelf, a securely mounted light can provide consistency without taking over the room. For other layouts, see space-saving hydroponic systems for apartments.
Check growth and protect the air gap
-
Make a quick daily check
I look for new leaves and steady growth, then compare the solution level with my starting mark. A falling level is normal: it creates the air gap that supplies oxygen to the upper roots.
-
Look for light leaks
I check around the lid and net cup for gaps that let light reach the solution. If I spot green growth inside the reservoir, I block the leak rather than leaving algae to compete for nutrients.
-
Inspect roots and smell the reservoir
Once a week, I lift the lid briefly. I want roots extending into the wet zone and healthy roots in the humid air gap. Tan nutrient staining alone does not worry me; slippery slime or a sour, rotten smell does. For those signs, I follow guidance on when to change hydroponic water and check for light leaks and excess heat.
-
Top up only when needed
For a longer-running crop, I add a little prepared solution if the level gets so low that the lower roots risk drying out. I keep the upper roots exposed to humid air.
Once upper roots have adapted to air, submerging them can deprive them of oxygen. I top up just enough to protect the lower roots, preserving the air gap.
Harvest and reset the reservoir
For a longer lettuce harvest, I pick the largest outer leaves first, leaving the small center leaves and growing point intact. That lets the plant keep producing. If I want the whole head—or the leaves have started turning bitter or sending up a flower stalk—I lift out the net cup and remove the plant and its roots. With basil, I cut stems just above a pair of leaves so new branches can grow.
I leave the reservoir alone while a partially harvested plant is still growing. Once the plant is finished, I pour out the old solution, remove any loose roots or algae, and wash the container and lid with mild soap. I scrub away residue, rinse thoroughly, and let the parts dry before mixing fresh nutrients for the next transplant. I don’t reuse the spent solution for another crop: its nutrient balance is no longer known.
Before replanting, I note the container’s capacity, the days from planting to first and final harvest, and whether the solution nearly ran out. Those notes tell me whether to use a larger reservoir next time or harvest sooner. My rule for every new planting stays the same: start with roots able to reach the nutrient solution; as the plant drinks, preserve the air space above it.
Harvest outer leaves for continued growth or remove the whole plant when finished. Clean the reservoir, record how it performed, and start the next crop with roots reaching solution while preserving the air gap as it falls.
