
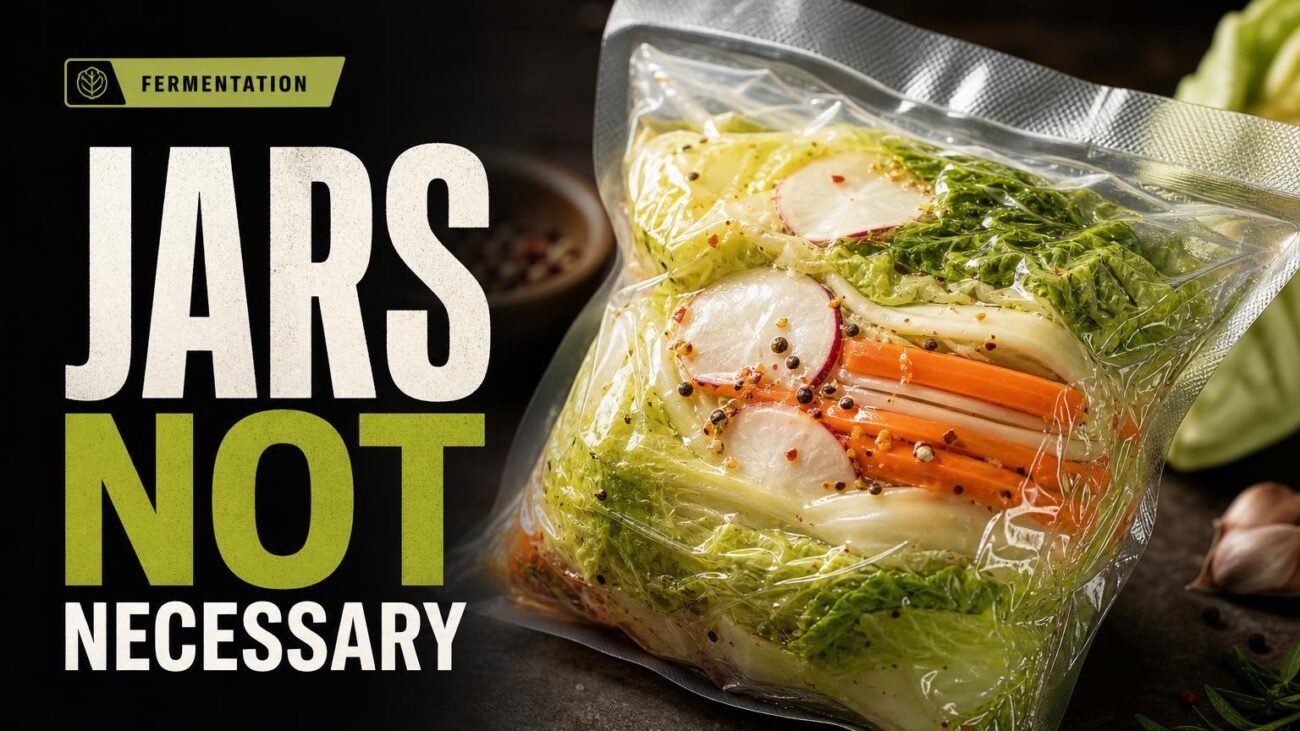
Yes — I use bags and a vacuum sealer
For this method, I use vacuum-sealer bags and a vacuum sealer. With many vegetables, the salt pulls out enough moisture that I don’t need to mix a separate brine.
That’s the appeal for me: fewer moving parts. The fermentation itself is still ordinary lacto-fermentation; the bag simply gives me a different way to manage air and liquid.
How the Method Works
The basic process is simple. Lactic-acid bacteria use sugars in the vegetables and gradually make the mixture more acidic.
Three things matter most inside the bag:
- Salt pulls out moisture. That liquid collects around the vegetables and often becomes all the brine I need.
- Fermentation lowers the pH. This is the real preservation work; removing the air is not a substitute for fermentation.
- CO₂ is produced. The bag may loosen and inflate as the ferment becomes active.
With a jar, I’m usually trying to keep every piece below the brine. With a bag, I remove most of the air at the start and keep the vegetables pressed into the liquid they release. That is the practical difference.

A handheld sealer makes the low-air idea very visual: zip the reusable valve bag, pull out the air, and store it compactly.
Three useful misconceptions to clear up
Why I Bother Using Bags
I still like jars, but bags earn their place in my kitchen for a few very practical reasons:
- No fermentation weights. There is nothing to keep pushing back under the surface.
- Small batches are easy. I can ferment a modest amount without choosing a jar that is too large or too small.
- Less washing. There is no jar, lid, weight, or airlock to clean afterward.
- Easy labeling. I write the vegetable, date, and salt percentage directly on the bag.
I don’t think bags make a ferment automatically better. They just make some batches less fiddly, and that is enough reason for me to use them.
Vacuum bags are disposable. Jars can be washed and reused for years. I use bags when the convenience is worth the waste, not because I think jars have suddenly become old technology.
What I Actually Need
I don’t use special fermentation gear for this. My basic setup is only three things:
- A vacuum sealer that gives me enough control around wet food.
- Compatible embossed bags or rolls for an external vacuum sealer.
- A digital scale so I can calculate salt by weight instead of guessing with spoons.
Everything else is ordinary kitchen gear: a knife, cutting board, bowl, and salt.

The V23 also includes adapters for regular- and wide-mouth Mason jars, so I can use the same machine for vacuum-sealed jar storage. For an actively fermenting jar, though, I still want a fermentation lid or airlock so CO₂ can escape.
For this bag method, the feature I care about most is its wet-food mode, because salted vegetables quickly start releasing brine.
- Wet-food handling
- Liquid & wet-food vacuum mode
- Jar adapters
- Regular- and wide-mouth Mason jars
- Bag setup
- Built-in roll storage and cutter
Bags: precut for convenience, rolls for flexibility
The bags need the textured or embossed channels used by external vacuum sealers. Smooth chamber-vacuum pouches are a different thing.
Precut bags are fast and tidy. For fermentation, though, I often like rolls because I can make the bag deliberately long. That extra plastic above the food becomes useful once CO₂ starts taking up space.

The embossed texture creates air-removal channels for an external sealer. These 8 × 12 inch precut bags suit small batches; when I want more room for CO₂, I cut a longer bag from a roll.
The scale matters more than it looks
This is the one piece of equipment I wouldn’t replace with eyeballing. If I’m using a 2% starting ratio, I need the vegetable weight first. A scale that reads in 1 g increments is enough for the sort of batches I make at home.
I weigh the salt in grams. I don’t guess with tablespoons.

How I Pack a Batch
-
Weigh the vegetables
I trim and cut everything first, then weigh the prepared vegetables in grams.
-
Calculate the salt
For many simple vegetable ferments, I start around 2% salt by weight. For 1,000 g of vegetables, that means 20 g of salt.
-
Mix well
I toss or gently massage the salt through the vegetables so it is evenly distributed. Cabbage gets more massage; firm carrot sticks need much less.
-
Fill the bag
I keep the vegetables low in the bag and leave plenty of unused plastic above them. I also keep the sealing area clean and dry.
-
Vacuum gently
I stop before liquid gets pulled into the machine. If the sealer has a wet-food or pulse mode, this is when I use it.
-
Seal, then label
I usually add a second seal, then write the date, vegetable, and salt percentage on the bag before I put it aside to ferment.
One small habit that helps: I make the bag longer than the food needs. That extra headroom gives CO₂ somewhere to go and leaves enough clean plastic to vent and reseal later if I need to.
What I Do While It Ferments
I keep the sealed bag out of direct sunlight at a fairly steady room temperature. I don’t chase an exact number of days, because different vegetables and room temperatures move at different speeds.
I look for change, not a schedule
Over time, the vegetables usually soften a little, the liquid level rises, and the bag becomes less tight. Warmer rooms tend to move things along faster; cooler rooms slow them down.
I try not to open the bag just to check on it. Every opening means I have to handle the seal again, and most of the time there is nothing useful to do anyway.
If the bag gets very tight
A slightly swollen bag doesn’t bother me. If it becomes drum-tight, I cut the top open, let the gas escape, wipe the inside of the sealing area dry, and reseal it.
This is why I leave extra plastic above the food from the beginning. A bag that is cut too short gives me almost no room to recover later.
Once fermentation is active, I usually just remove the excess gas and reseal. I don’t need to crush the vegetables back into a brick every time the bag inflates.
When I Call It Done
I don’t use one signal by itself. A bag can be very active and still not taste the way I want.
I usually check three things:
- Acidity: it should taste clearly sour, not just salty.
- Texture: I want some crunch left, especially with carrots, radishes, and cauliflower.
- Aroma: pleasantly sour, vegetal, or funky is fine; rotten is not.
If I want a number instead of relying only on my senses, I test the liquid. A pH of 4.6 or lower is the useful benchmark I look for. Once the ferment tastes right, I move it to the refrigerator. Cold slows the process dramatically, but the flavor can still keep changing.

I use pH as a check, not as a flavor meter.
What I Like to Ferment in Bags
Carrots, radishes, cabbage, cauliflower, turnips, green beans, and peppers are easy places to start.
I like vegetables that release a useful amount of liquid once salted.
Uniform cuts make the batch much easier to judge.
They can work, but I treat them as a slightly fussier project.
Flavoring the bag
I add seasonings before sealing, so there is no separate infusion step. A few combinations I come back to are:
- Carrot + ginger + garlic
- Cabbage + caraway
- Radish + chili + garlic
- Cauliflower + turmeric + black pepper
- Jalapeño + garlic + oregano
I keep the first batch simple. It is much easier to learn what fermentation changed when I’m not trying to identify twelve spices at the same time.
The First Batch I’d Make
If I were trying this method for the first time, I’d start with 500 g of carrots and 10 g of salt. That gives me the same 2% starting ratio without committing much food to the experiment.
For a little flavor, I might add:
- a few thin slices of fresh ginger,
- one small clove of garlic, or
- a pinch of chili flakes.
Then I use the packing method above and leave the bag alone to develop. Carrots are useful teachers: when they are under-fermented they mostly taste salty, and as they develop I get more acidity and aroma while still keeping some snap.
I wouldn’t pile in several seasonings on the first try. Once I know what a plain batch tastes like, the next bag can get more interesting.
When I Toss a Batch
Most batches are easy to read, but there are a few things I don’t negotiate with:
- Visible fuzzy mold on the food or inside the bag.
- A genuinely putrid smell rather than the sharp, sour funk I expect from fermentation.
- A failed or leaking seal when I no longer know how long the food sat exposed.
- Vegetables breaking down into something obviously slimy or rotten-looking rather than simply becoming softer.
If I’m staring at a questionable bag and trying to talk myself into eating it, I usually stop there. A handful of carrots is cheaper than proving a point.
Appearance and smell help me spot obvious failures, but they are not substitutes for a ferment actually becoming acidic. That is why I pay attention to the process and use pH when I want a measurable check.
A Few Questions I’d Expect
Can I do this with a zip-top bag instead of a vacuum sealer?
I can push a lot of air out of a zip-top bag with the water-displacement method, but I don’t consider it quite the same setup. For repeatable results, I prefer a proper vacuum-sealer bag and heat seal.
Would a chamber vacuum sealer work better?
Yes, especially with very wet ingredients. Chamber machines handle liquids more gracefully than external sealers, but they are larger and more expensive. I don’t think one is necessary for ordinary vegetable batches.
Does refrigeration stop fermentation completely?
No. It slows fermentation dramatically, which is what I want once the flavor is where I like it. The vegetables can still keep changing slowly in the fridge.
Can I use the same bag method for meat, fish, or cooked foods?
I don’t. This guide is about raw vegetable lacto-fermentation. Meat, seafood, cooked foods, and other low-acid vacuum-packed foods bring different safety concerns, so I treat them as a separate subject.
Why I Keep Using This Method
- Use the bag to simplify the setup, not to skip the basics of fermentation.
- Start small, write down the salt percentage, and change one thing at a time.
Vacuum-sealed fermentation is not a replacement for every jar on my shelf, but it has become one of my favorite ways to make small vegetable ferments. The setup is simple, the salt calculation is easy to repeat, and once the bag is sealed there is very little to fuss with.
If I were starting again, I’d keep the first batch boring on purpose: one firm vegetable, about 2% salt, plenty of extra bag above the food, and enough patience to learn what the changes actually look, smell, and taste like.
- Try the 500 g carrot batch above and use it as a baseline for the next ferment.
