
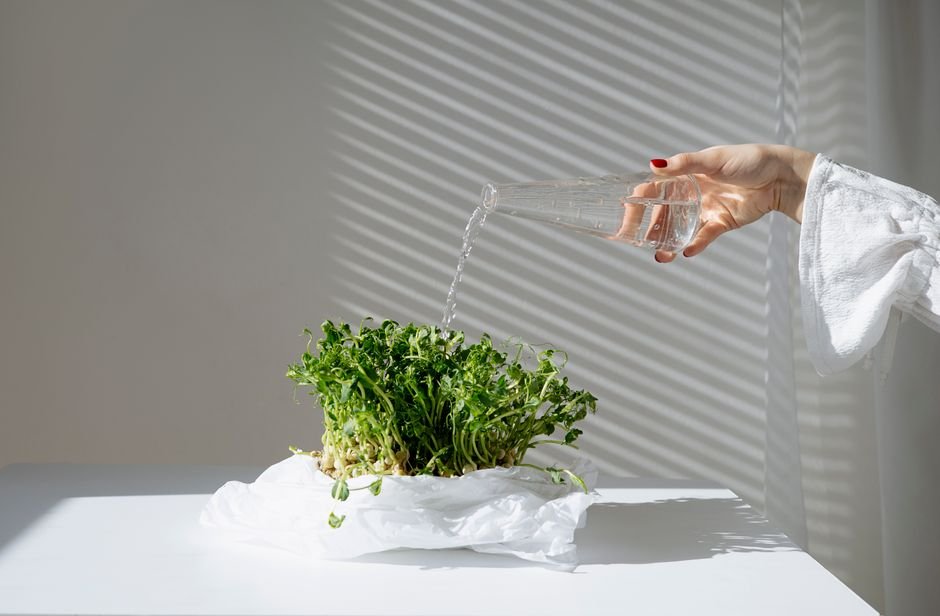
A sunny sill feels effortless—until the tray starts leaning like grass in shade.
A south-facing sill can look bright at breakfast and feel gloomy by midafternoon, especially in winter or behind coated glass. Microgreens often still sprout there, but sprouting is not the same as steady growth: weak light can leave stems long, pale, and floppy, while cloudy stretches may slow a tray that seemed promising two days earlier. The trade-off is simple—windowsills are convenient; consistent light is more reliable.
- Many microgreens finish in about 7–14 days, so even a few dim days can show up quickly.
- Rotating trays can reduce leaning, but it does not increase total light.


Yes—if the window is bright enough
- It can work Microgreens can grow on a windowsill without grow lights when the spot gets strong, unobstructed daylight for much of the day. South-facing windows often give the steadiest results in cooler climates, while east or west windows may work for easier crops.
- Expect variation The tradeoff is control. Natural light changes with season, weather, nearby buildings, trees, and the angle of the sun, so one tray may grow upright and green while the next turns pale or stretches.
- Lights add consistency Grow lights are not what make microgreens possible. They mainly make the process more predictable by giving seedlings a steady light source at a consistent distance each day.
- Watch the seedlings If the tray leans hard toward the glass, looks long and weak, or stays yellow after the blackout period, the window is likely too dim for reliable results.
What light does after sprouting
Seeds do not need much light to wake up. Germination is mostly powered by the food stored inside the seed, plus moisture and warmth. That is why many trays start covered or in darkness without any problem.
Light matters most after the shoots appear. At that point, the tiny plants begin making chlorophyll, opening their leaves, and strengthening their stems. A bright windowsill helps pale sprouts turn greener, cotyledons spread wider, and stems stay a little stockier instead of reaching hard toward the glass.
This is different from growing a full-size herb or salad plant for weeks. Microgreens are harvested young, so the light window is short but important. The key moment is the transition described in blackout and light timing: once the cover comes off, the tray benefits from the brightest indirect or gentle direct light available.
If stems quickly lean, fade, or grow long and thin, the window may be too dim or one-sided. Turning the tray once or twice a day can help growth stay more even.
How to tell whether a windowsill is bright enough
-
Window direction
South-facing windows usually give the longest useful light in the Northern Hemisphere, while east and west can work if the crop gets several bright hours. North-facing sills are often dimmer, especially in winter.
Look forA sill that receives direct sun or very bright sky light for part of the dayAvoidA window that looks pleasant but stays softly lit from morning to evening -
Outdoor obstructions
Trees, balconies, nearby walls, deep roof overhangs, and window screens can cut light sharply. A bright room does not always mean the tray itself is getting strong light.
Look forClear sky view from the tray level, not just from eye levelAvoidLight blocked by buildings, branches, awnings, or heavy screens -
Season and glass
Low winter sun, short days, tinted glass, and double glazing can all reduce usable light. A sill that works in April may produce pale, stretched greens in December.
Look forCrisp shadows near midday and steady brightness across the trayAvoidWeak, blurry shadows and a cool, dim window in the growing season being tested -
Seedling behavior
Microgreens give quick feedback. If stems lean hard toward the glass, grow tall and thin, or green unevenly, the location is probably marginal.
Look forShort, upright stems with even color across the trayAvoidStrong leaning, long pale stems, or one bright edge and one weak edge
Place an empty tray on the sill for a day and check it at breakfast, midday, and late afternoon. Stronger spots usually show a clearer shadow from a finger or pencil, while weaker spots give only a soft blur.
If the bright patch moves off the tray for most of the day, rotating the tray can help even growth, but it cannot replace missing light.
Choose crops that forgive imperfect light
Uneven natural light is often easier to manage by changing the crop than by fussing with the setup. Fast growers such as radish, broccoli, kale, cabbage, arugula, pea shoots, and sunflower shoots tend to give clearer results on a bright sill because they finish before minor stretching becomes a big problem.
Radish and arugula usually bring quick feedback, with visible growth and bold flavor in a short window. Pea and sunflower shoots are sturdier, so they can look more satisfying even when the light is not perfectly even. For timing expectations, it helps to compare how long different microgreen varieties take before choosing a first tray.
Slower, delicate herbs are less forgiving indoors. Basil, cilantro, parsley, and similar crops often need more patience, steadier warmth, and more consistent light to look tidy as microgreens. They can still be fun later, but they are not the easiest test of whether a windowsill is working.
Windowsill setup checklist
-
Use a shallow draining tray, about 1–2 inches
-
Choose coir, a grow mat, or fine potting mix
-
Sow densely, but not in piles
-
Mist or rinse gently, then let excess water drain
-
Rotate daily; avoid cold glass, heaters, pets, and wobbly ledges
Soil-free countertop trays
On The Grow shows four microgreens grown together in a small sprouting tray, useful for comparing other easy indoor setup options.
Reading the seedlings
Microgreens usually show stress quickly, which is useful on a windowsill. A tray can look fine one morning and stretched or patchy two days later. Most problems come from a small handful of causes: light angle, moisture, crowding, and stale air.
| What is visible | Likely cause | Modest fix |
|---|---|---|
| Long, pale stems leaning toward glass | Not enough usable light, or light from one side | Move to the brightest sill available and rotate the tray daily |
| Green tops but weak, floppy stems | Low light plus warm conditions | Harvest a little earlier, or choose faster crops next time |
| Yellow patches in one corner | Uneven light, dry edge, or cold glass nearby | Turn the tray and keep it slightly away from chilly panes |
| Moldy fuzz on seed hulls or soil surface | Too much moisture, dense sowing, poor airflow | Water less, sow thinner, and add gentle air movement |
| Seeds sprout unevenly | Dry spots, old seed, or seed buried too deeply | Mist evenly during germination and use a flatter surface next tray |
Stretching is the most common windowsill complaint. It does not always mean the tray is ruined; many mild cases are still harvestable. The texture may be softer, and the stems may tangle more, but a prompt harvest can rescue a usable crop.
Watering is the other easy place to improve. The growing medium should feel damp, not swampy. Bottom watering often helps because it keeps stems drier and reduces splashing around delicate seedlings.
If one tray struggles, change only one or two things next time. Try a brighter position, daily rotation, or a slightly thinner sowing before buying extra equipment. Small adjustments make it easier to see what actually helped.
When a grow light starts to make sense
A windowsill can work beautifully in spring or summer, then disappoint in January. Short days, low sun angles, north-facing glass, nearby trees, deep roof overhangs, and long runs of cloudy weather can all leave microgreens pale, leggy, or leaning hard toward the window.
That is where a small light becomes less of a gadget and more of a stabilizer. It does not need to replace natural light; it can simply extend weak daylight or even out growth on dim weeks. For anyone comparing options, a basic guide to grow lights for microgreens can help make sense of spectrum, height, and timer settings.
Grow lights are especially useful when harvests need to be predictable. A tray started on a dark sill may still grow, but timing and quality can vary from batch to batch. With supplemental light, the setup becomes easier to repeat: same shelf, same distance, similar hours, fewer surprises.
A modest approach is enough for most hobby trays:
- Start with 10–14 hours of light after germination.
- Keep the lamp close enough to brighten the tray, but not so close that seedlings dry out quickly.
- Rotate trays if one side still stretches.
- Use natural window light when available, and add the lamp during dim stretches.
Adjustable lamp for small indoor trays
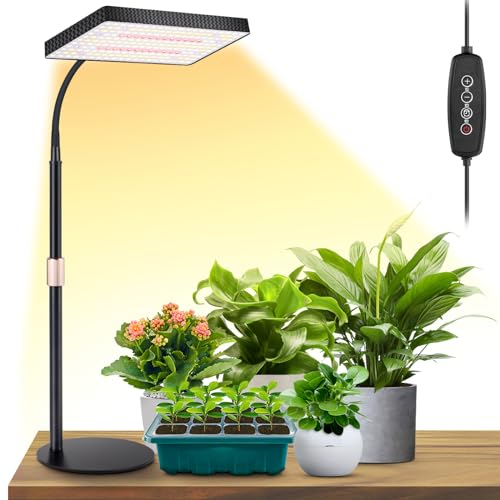
This compact LBW desk-style grow light is a practical option for one or two small trays where window light is inconsistent. It has 214 full-spectrum LEDs, an adjustable height range of about 10 to 26 inches, six brightness levels, and timer settings listed as 4/8/12 hours.
It may suit a windowsill or counter setup where a fixed shelf light feels like too much. The single-head design is simple, though coverage may be limited for wider trays.
Try one tray before buying more gear
A windowsill does not need to be judged in theory. A small, quick crop will show what the light can really do. Sow one shallow tray of radish, broccoli, mustard, or another fast microgreen, place it on the brightest sill available, and rotate it once a day so the stems do not lean in one direction for long.
After several days in the light, the tray gives a clear answer: compact stems and opening green leaves mean the sill is workable; pale, stretched, strongly leaning growth means expectations may need to shift. That might mean harvesting earlier, choosing more forgiving crops, waiting for a brighter season, or adding a light later. For the full process, from sowing through cutting, see this guide to growing microgreens from seed to harvest.

I liked the checklist section. Drainage is the thing I ignored at first and it caused more problems than the light, honestly.
My tray sat in water on the sill and the bottom smelled awful by day 5. Now I use a shallow tray with holes inside a catch tray, and I lift it once a day so it isn’t constantly soggy.
Honestly I think grow lights are worth it if you’re doing this regularly. I messed around with windowsills all winter and every tray was different depending on the weather.
Not saying the windowsill method can’t work, but if someone wants predictable harvests, a cheap light removes a lot of guessing.
That’s a fair take. Windowsills are great for testing the habit and growing a tray here and there, but grow lights really help with repeatability — especially in winter, north-facing rooms, or cloudy climates. I usually suggest trying one tray first so people don’t buy gear before knowing whether they enjoy the process.
Yep. I started with a window and ended up buying a small LED bar after two months. Not fancy, just consistent.
The bit about watching the shadows was helpful. I always thought my living room window was “bright” because the room feels bright, but the tray itself only gets direct sun for maybe an hour.
No wonder my basil microgreens looked like pale spaghetti. Lesson learned.
Fast brassicas are definitely more forgiving. Mustard and radish were almost impossible for me to mess up, even in a west window with some tree shade.
Cilantro though? Nope. Took forever, looked uneven, and then I got impatient and harvested basically garnish dust.
The “read the seedlings” section was the most useful for me. I kept blaming low light, but my trays were also way too dense and had no airflow.
Once I sowed thinner, the color improved and they didn’t collapse as much. So yeah, my windowsill was only half the problem lol.
I tried pea shoots on an east-facing windowsill and they did okay, but sunflower was hit or miss. The seedlings leaned hard during a cloudy week and the stems got kind of weak.
The article’s point about short crop cycles is so true. You don’t get much time to correct mistakes before the tray is already harvestable or sad.
Exactly — with microgreens the feedback loop is very fast. For peas, you can usually get away with moderate light if the tray is rotated and not oversown. Sunflower tends to show uneven light more obviously, especially if the shells stay on and the tray is crowded.
Same here with sunflower. I started spacing the seeds a little less densely and it made a bigger difference than I expected. Still not perfect, but less floppy.
One thing I’d add is that the window temperature matters too. My sill gets bright sun but the glass is cold in February, and the tray closest to the pane always germinates slower.
Moving it back just a few inches helped, plus rotating like you mentioned. It’s funny how “windowsill growing” sounds simple until you realize the sill has its own weird little climate.
Great point. Cold glass can slow germination and growth even when the light is decent. I like keeping trays slightly back from the pane in winter, or germinating somewhere warmer first and moving them to the sill once they’ve emerged.
This happened to me too. The side near the window was basically in refrigerator mode while the room side was fine.
I can confirm the “yes, but” part. My south-facing kitchen window grows radish and broccoli microgreens fine, but anything slower gets leggy fast.
Rotating the tray every day helped more than I expected. Before that they all looked like they were trying to escape toward the glass 😂